Showing posts with label Sides. Show all posts

Wednesday, September 7, 2011

Simple Tomato Sauce

I've made tomato sauce so many different ways -- with canned tomatoes, with fresh tomatoes, with butter, with olive oil, with onions, with meat. Some are complicated all-day affairs, and some are quick to throw together and simmer for only 30 minutes. This particular tomato sauce falls in the latter category and uses fresh plum tomatoes, a little garlic, and some olive oil to make a simple sauce that I used in two other recipes.


It also involves a step I've never tried before: scraping the tomatoes against a box grater. This allows you to separate the pulp from the skins and easily discard the skins. (Just be careful to keep your fingers out of the way.)

The recipe comes from Domenica Marchetti's The Glorious Pasta of Italy, which is quickly becoming one of my favorite cookbooks. I flip through it on a regular basis to find dinner ideas.

Simple Tomato Sauce (adapted from The Glorious Pasta of Italy)
Makes about 3 cups

Ingredients

3 pounds plum tomatoes
2 garlic cloves, lightly crushed
1/4 cup extra-virgin olive oil
Kosher salt

Preparation

Cut the tomatoes in half lengthwise, and scoop out the seeds with your fingers. It's easiest to do this over a bowl set next to your cutting board. Once you're done, discard the seeds.


Place a box grater on a cutting board with a moat, and hold the cut side of each tomato half against the large holes of the grater, and grate until all that's left in your hand is the skin. Discard skins. Periodically scoop up the pulp and transfer it to a large bowl so as not to crowd your cutting board.


Heat the olive oil in a large skillet over medium-high heat. Add the garlic, and press down on it with a wooden spoon to infuse the oil.


After 2 minutes, when the garlic starts to sizzle but hasn't turned brown, carefully stir in the tomato pulp.

Season with 1 teaspoon salt, raise heat to medium-high, and bring the sauce to a simmer.


Reduce heat to medium-low, and let tomatoes simmer uncovered, stirring occasionally, for 25 to 30 minutes, or until thickened.


Serve with pasta, or use in any recipe that calls for a simple tomato sauce.

Store in fridge in an airtight container for up to 3 days, or freeze for up to 3 months.

Come back tomorrow for a recipe that calls for this tomato sauce.

Do you have a tried-and-true tomato sauce recipe?

Friday, April 22, 2011

Polenta-Crusted Fish Cakes And Panko-Crusted Asparagus


I'm still on my mission to try more interesting fish recipes, so when I came across these polenta-crusted fish cakes in Food & Wine, I quickly dog-eared the page. In the same issue, I found a recipe for panko-crusted asparagus and decided that since I was already frying fish cakes, I may as well fry asparagus too and try both recipes in one night.

I first read through both recipes so I could figure out how to get the fish cakes and asparagus on the plate at the same time and have both be piping hot, and then I got to work. I made the tomato sauce for the fish cakes (oh yes, there's a tomato sauce) and set it to the side, and then I started boiling the potatoes for the fish cakes. While the potatoes boiled, I prepped, dredged, and coated the asparagus. Then I shaped all the fish cakes and rolled them in polenta. Because the asparagus can be kept warm in the oven, I fried the stalks first, transferred them to a sheet pan, and let them hang out in the oven while I fried the fish cakes.

It took much longer to do all of this than I had anticipated, but I also felt a little scatterbrained in the kitchen that evening (do you ever have those nights when you just can't focus?), so if I had been more on top of my game, I think I would have gotten dinner on the table more quickly. I'd say make sure to give yourself at least about an hour and a half if you make both dishes. (I also wrote the recipes separately in case you don't want to make both.)

Tomato Sauce (adapted from Food & Wine, May 2011)

Ingredients

1 tablespoon olive oil
6 garlic cloves, minced
5 plum tomatoes from 1 can whole, peeled San Marzano tomatoes, chopped
1 tablespoon tomato paste
1/3 cup water
Salt

Preparation

Heat olive oil in large skillet over medium-low heat. Add garlic, and cook until fragrant, stirring frequently, about 3 minutes.


Add the tomatoes and any collected juices, and cook over medium heat until thickened, about 10 minutes.


Stir in tomato paste and water, and cook for 2 more minutes. Season with salt, and set sauce aside to serve with fish cakes.


Polenta-Crusted Fish Cakes (adapted from Food & Wine, May 2011)
Printable version

Ingredients

3/4 pound Yukon Gold potatoes, peeled and cut in 1-inch chunks
1/4 cup instant polenta
1 1/2 pounds skinless cod, cut in 1-inch chunks
4 garlic cloves, minced
2 teaspoons kosher salt
1 1/2 teaspoons ground cumin
1 large egg, lightly beaten
1/4 teaspoon crushed red pepper
2 tablespoons canola oil

Preparation

Place potatoes in a saucepan, and cover them with cold water. Bring to a boil, and continue to boil over medium-high heat for 7 minutes. Drain well, and lightly mash potatoes with a fork. Set them aside.


Spread the polenta in a large, shallow dish.

In a food processor, combine the fish, garlic, salt, egg, and crushed red pepper, and pulse until fish is coarsely chopped.


Dump the fish mixture into a large bowl, and fold the potatoes into the fish mixture.


Shape the mixture into about 12 patties, and coat the patties on both sides with the polenta.


In a large nonstick skillet, heat 1 tablespoon of the oil. Pan-fry half of the fish cakes over medium-high until cooked through and golden brown, 3 to 4 minutes per side.


Transfer the cakes to a plate lined with paper towels.

Add the remaining tablespoon of oil to the skillet, and fry the remaining fish cakes.


Transfer those to the paper towel-lined plate too. Serve hot or at room temperature with tomato sauce.


Note: The recipe yields a lot of fish cakes, and they're very filling, so I'd either recommend waiting to make these on a night when you'll have a few guests over or refrigerating half of them before you fry them so you can make more the next night. I went the route of refrigerating some of them, so I let the potatoes cool before folding them into the fish mixture.

Panko-Crusted Asparagus (adapted from Food & Wine, May 2011)
Printable version

Ingredients

1 cup panko
1/4 cup flour
2 large eggs, lightly beaten
1 lb asparagus, ends trimmed
1/2 cup canola oil
Kosher salt

Preparation

Preheat oven to 225 degrees, and line a sheet pan with foil.

In food processor, pulse panko until fine.

Set up three shallow dishes, place the flour in the first one, the eggs in the second one, and the panko in the third one.


Dust all but the tips of the asparagus with the flour. (It's easiest to do this by holding the asparagus stalks by the tips.)

Dip the floured part of the asparagus in the egg.

And dredge all but the tips of the asparagus in the panko.


In a large skillet, heat the canola oil over medium-high heat. Line a plate with paper towels.

Fry the asparagus in batches, turning, until golden and crisp, about 3 minutes.


Transfer the asparagus to the paper towel-lined plate, and season with salt.


After each batch has dried on the paper towels, transfer it to the prepared sheet pan, and place the asparagus in the oven to keep warm until all batches are ready. Serve hot.


The asparagus stalks were well cooked and softened from spending some waiting time in the oven, so the crunchy panko coating provided the perfect contrast to the tender vegetable. The cumin-scented fish cakes topped with the garlicky tomato sauce paired well with the asparagus and filled us up. I think it's all those potatoes in the fish cakes. I liked that the polenta merely acted as a crispy coating and the fish cakes were all fish and potatoes and weren't padded with bread crumbs.

Have you ever made fish cakes before?

Wednesday, March 30, 2011

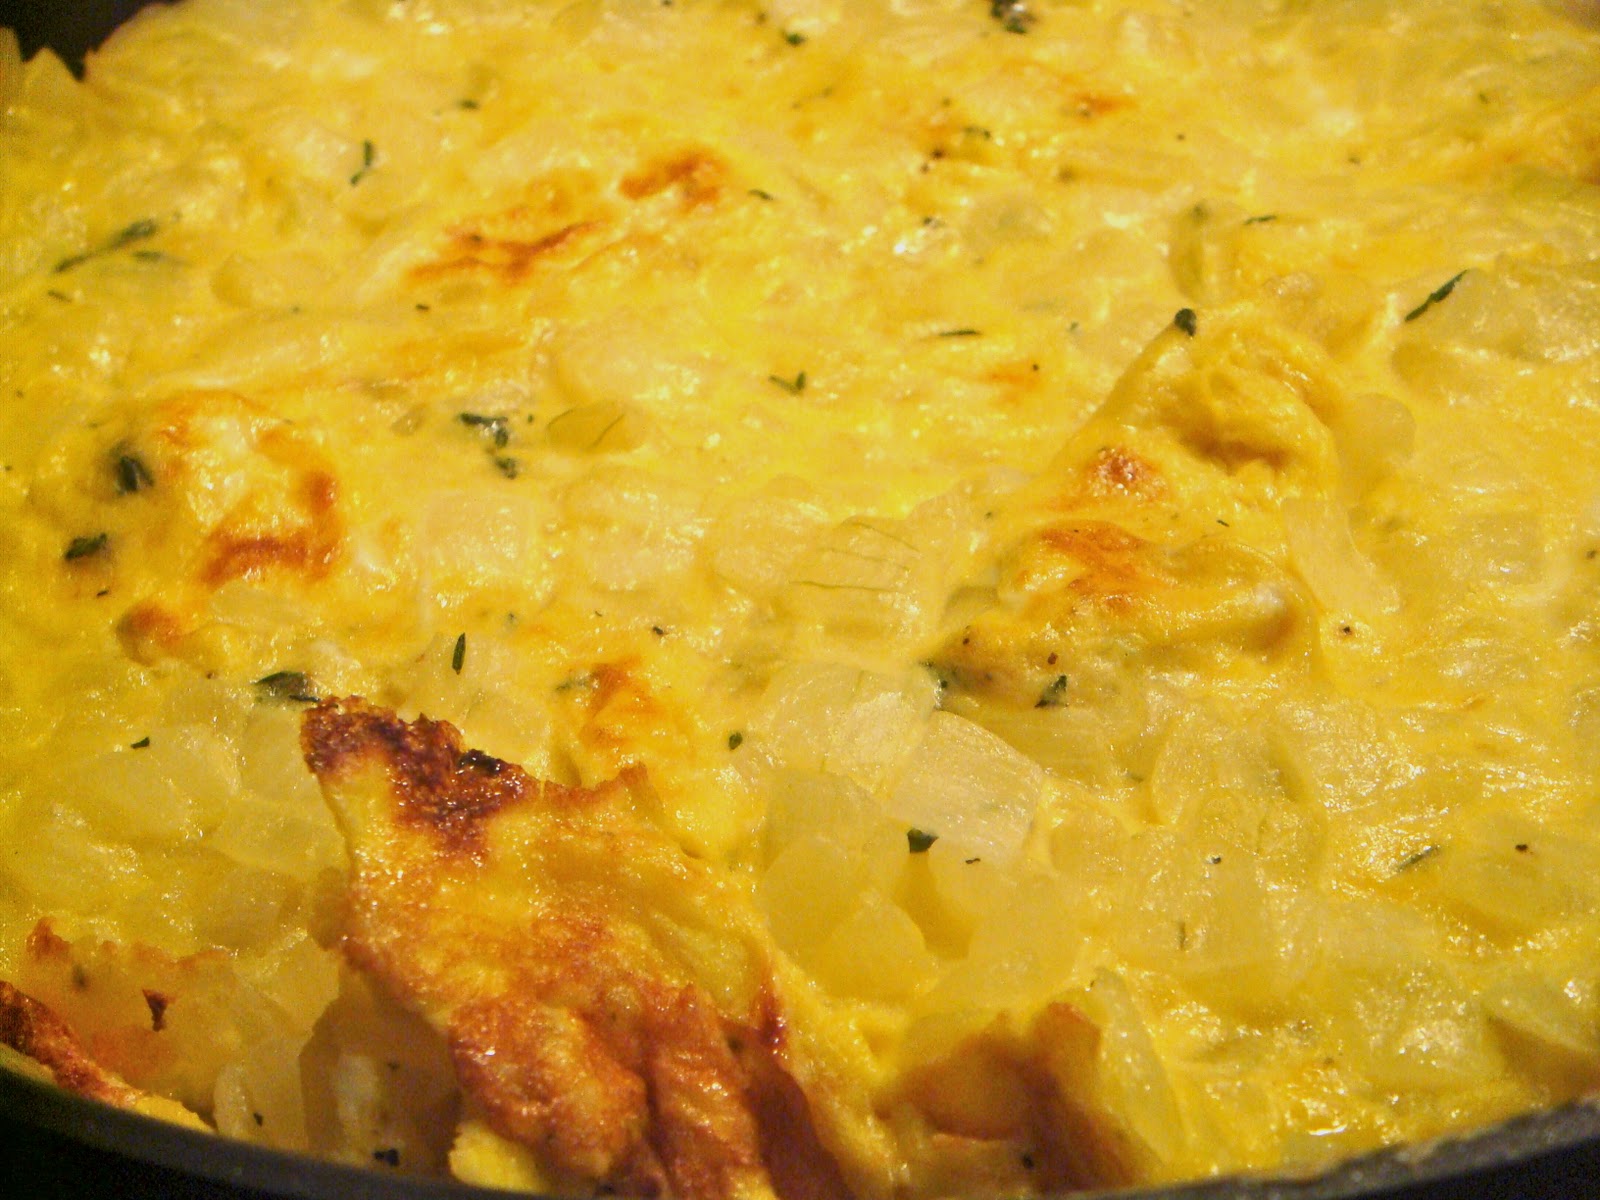
Onion And Thyme Frittata


And just when I thought I couldn't come up with another use for my extra onions, The New York Times came to the rescue with a recipe for an onion and thyme frittata. I'm honestly not sure why I didn't think to make a quiche or frittata before this recipe appeared in my Google Reader. As the recipe even says, frittatas are "terrific lunchbox fare." On top of currently looking for ways to use up my onions, I am always looking for creative lunch ideas, and it's been a long time since I made quiche for lunch and even longer since I made a frittata.

I got home from work last Monday and was excited to whip up this frittata to take for lunch the rest of the week, having just eaten a boring salad for lunch that day. This frittata is protein-rich and carb-lite, making it just the thing to fill me up but keep me going for the rest of the day. Those after-lunch hours can drag sometimes, and a carb coma doesn't help them go by any faster.


Onion And Thyme Frittata (adapted from Martha Rose Shulman/The New York Times)

Ingredients

1 large white onion, diced
3 tablespoons olive oil
2 garlic cloves, minced
1 tablespoon fresh thyme
6 eggs
2 tablespoons heavy cream
Kosher salt and pepper

Preparation

Heat 2 tablespoons olive oil in ovensafe 10-inch nonstick skillet. Add the onions, and cook, stirring often, until softened, about 5 minutes.


Season with salt, and stir in garlic and thyme.


Cook about 5 more minutes, until onions color slightly but don't brown. Remove from heat, transfer onions to a plate, and let cool while you prepare the eggs. (Clean and dry the skillet to use again.)


Whisk together eggs, salt and pepper, and cream in a large bowl. Stir in the onions.


Over medium-high heat, heat the remaining tablespoon of olive oil in the skillet.

Pour in the egg mixture. Use a rubber spatula to lift the set egg away from the edges and let the uncooked egg run underneath.


Turn heat to low, cover, and cook 10 minutes. Uncover and loosen the frittata with the spatula occasionally so it doesn't stick. After 10 minutes, the bottom should be golden brown, and the egg should be mostly set. Cook for a few more minutes if this isn't the case.


Preheat the broiler. Uncover the pan, place it under the broiler (not too close), and cook for 1 to 3 minutes. (Mine needed 3 minutes.) The top will get just slightly golden.


Let the frittata cool for 5 to 10 minutes, and then loosen the edges, and slide or flip it onto a plate.


Cut it into wedges, and serve it immediately, or let it cool, and pack it up for lunch.


If I had more vegetables on hand, I definitely would have spruced this up a bit, but I really enjoyed eating it cold for lunch with some salad greens and leftover steak last week. It has just enough flavor from the onions and thyme, one of my favorite herbs.

The onions are all gone now. In addition to this frittata, you saw the onion strings and the onion gratin, which took one onion each. And then I sauteed one of the remaining two and served it with steak, and I used the other in some slow cooker chicken quesadillas. I know it's not terribly difficult to use up onions, but I was proud of myself for finding interesting ways to incorporate some of them and for not letting any of them go to waste.

What would you put in a frittata? 

Tuesday, March 29, 2011

Onion Gratin


When you have an onion surplus, you need to get creative. Onion soup? Check. Onion strings? Check. Onion...? Onion...? What else can I make with onions?! (Yes, I was talking to myself about the onions.) I finally thought of onion gratin. A creamy dish of soft, baked onions with a hint of cheese sounded like just the thing to pair with some crispy fish for dinner.

I searched for recipes and finally decided on one from Closet Cooking. It was on this blog that I found that recipe for maple-dijon vinaigrette for my brussels sprouts, so I knew I could trust the recipe, and it sounded easy enough to make on a weeknight.

Luckily for Jeff, the onions in this gratin don't need to be thinly sliced, so I cut them into quarter-inch thick slices all on my own and left the mandoline safely tucked in the cabinet. I made a few modifications to the recipe, like leaving out the wine (I know. What was I thinking?) because I didn't have an open bottle and knew I'd end up wasting a lot of it if I opened a bottle midweek. I was really happy with the results, but I think next time I would use a different cheese, maybe Gruyere, so the cheese would get really bubbly and brown on top. Parmesan just didn't cut it.


Onion Gratin (adapted from Closet Cooking)

Ingredients

1 large white onion
1 tablespoon olive oil
Salt and pepper
1 tablespoon chopped fresh thyme
1 cup heavy cream
1/4 cup grated Parmesan (or other cheese)

Preparation

Preheat oven to 375 degrees.

Place onions on a foil-lined baking sheet in a single layer. Drizzle them with olive oil, season with salt and pepper, and sprinkle with thyme.


Bake for 15 minutes.


Meanwhile, bring the cream to a simmer in a small saucepan.

Transfer the onions to a baking dish, and pour the cream over them.


Cover the dish with foil, and bake for another 35 minutes.


Remove the foil, and sprinkle the Parmesan over the onions.

Raise the temperature to 450 degrees, and bake until cheese turns golden brown, about 5 minutes.


I highly recommend serving this luscious and creamy sweet onion dish with fish or steak, so you can scoop up onions and cream with each bite. The onions are also delightful on their own.


Have you ever bought too much of an ingredient and had to come up with creative ways to use it up?

Monday, March 28, 2011

Onion Strings


Remember how I bought all those extra onions for my onion soup? Well, I've been working my way through them. I started wracking my brain and the Internet for recipe ideas, and suddenly onion rings popped into my head. Only Jeff and I don't really love onion rings because of all the batter and the thickness of the onion slices, so he took my idea for onion rings and suggested onion strings. I needed no convincing!

I put a chicken in the oven to roast and started making the onion strings. They are so easy! First, you just get your sous chef to thinly slice the onions with the mandoline. Then you soak the onions in buttermilk for about an hour, heat your oil, toss the onions in seasoned flour, and fry them up. They're crispy, crunchy, salty, and downright irresistible! Seriously. Couldn't keep my hands off them.


Onion Strings (adapted from The Pioneer Woman Cooks!)
Printable version

Ingredients

1 large onion
2 cups buttermilk
2 cups flour
1 tablespoon kosher salt, plus more for sprinkling on top
1/4 teaspoon cayenne pepper
4 cups canola oil

Preparation

Thinly slice the onion, and place the slices in a baking dish.


Pour the buttermilk over the onions, and soak for about 1 hour, turning them occasionally to make sure both sides get coated in the buttermilk.

In another baking dish, combine the flour, salt, and cayenne pepper.


Heat olive oil to 375 degrees. While it's heating, line a large plate with paper towels, and have some salt nearby.

Once the oil is ready, grab a handful of onions, letting the excess buttermilk drip off them, and swirl them around in the flour mixture.


Shake off the excess flour, and drop them in the oil. Use a skimmer or spider to separate them.


Fry for a couple minutes, until light golden brown, and then scoop them out with a skimmer or spider, and place them on the paper-towel-lined plate. Sprinkle lightly with salt.


Repeat with remaining onions, frying in batches, until they're all gone.


Serve hot. And do try not to eat them all while you're frying them -- I lost that battle.


I thought these were amazing... and even better than what you get in most restaurants because the onion strings were fresh and hot, and we got to snack on them right after they came out of the oil.

I know some of you fear frying, and I admit it can be a little intimidating. For something like this, I use a deep pasta pot. The 4 cups of oil don't even fill it halfway, so I know the oil will stay in there and not really splatter. I also rely on my skimmer, which has a long handle, to reach into the pot and get the onions out. I'd really love a spider, which would be even better for this sort of task, but I just haven't bought one yet.

Onion rings, onion strings, or neither?