Showing posts with label Guest posts. Show all posts
Saturday, December 10, 2011
Guest Post On Confessions Of A Chocoholic
Want the recipe for these mini cranberry-ginger chocolate pudding parfaits? Head over to Confessions of a Chocoholic where I'm guest posting today!
Friday, February 18, 2011
Friday, November 12, 2010
Guest Post: Taco Dinner With All The Fixings
I'm away on a cruise right now, and I've asked some of my favorite local bloggers to write guest posts for me. Below, Emily from A Cambridge Story shares a recipe for tacos with plantains. Emily and I finally got the chance to meet at the I Can't Believe It's Not Butter event last month. It was great to get to know her in person after discovering so many random coincidences we have through reading her blog -- we live down the street from each other, we both have labs, we both went to boarding school for high school, we're the same age, and so on. I hope you enjoy her post! And please check out Emily's blog too!
My husband, Christopher, and I love making Mexican-inspired foods at home. Recently, we made one of our best tacos dinners to date. Maybe it was the 85-15 beef that I begrudgingly bought (I usually prefer leaner meat) or the cinnamon and cayenne carrots that we prepared. Whatever the reason, this meal was seriously a winner!
Taco Dinner with all the fixings
1 package of ground beef (or meat substitute)
1 onion diced
1 packet of taco seasoning (or make your own with chili, garlic, onion powders, cumin, red pepper flakes and paprika!)
1 plantain sliced into 1/4" rounds
1 package of Spanish rice (or, again, make your own with tomatoes and chili powder!)
3 carrots diced
1 tablespoon butter
1 teaspoon of ground cinnamon
1 teaspoon cayenne pepper
1 avocado diced
3 tomatoes diced
3 oz of sharp cheddar grated
4 taco shells
This recipe is pretty fool proof (always a plus!) First, cook rice. We use a rice cooker but the stovetop works just fine as well.
Brown ground beef and onions in a pan. Incorporate taco seasoning.
Salt and pepper the plantains and cook in a pan with some cooking spray until slightly brown. Flip and brown other side.
Blanche carrots in pot of hot water until slightly tender. Then, transfer to a pot with butter, cinnamon and cayenne pepper until carrots are cooked through.
Prepare toppings...
... and serve!
Not only was this meal simple but it incorporated a variety of textures and flavors. My favorite part was definitely the carrots - the cinnamon and cayenne paired perfectly, reminding me a bit of Mexican hot chocolate.
What do you serve with tacos? Do you focus on flavoring and enjoying the meat - or do you like to add all kinds of toppings?
My husband, Christopher, and I love making Mexican-inspired foods at home. Recently, we made one of our best tacos dinners to date. Maybe it was the 85-15 beef that I begrudgingly bought (I usually prefer leaner meat) or the cinnamon and cayenne carrots that we prepared. Whatever the reason, this meal was seriously a winner!
Taco Dinner with all the fixings
1 package of ground beef (or meat substitute)
1 onion diced
1 packet of taco seasoning (or make your own with chili, garlic, onion powders, cumin, red pepper flakes and paprika!)
1 plantain sliced into 1/4" rounds
1 package of Spanish rice (or, again, make your own with tomatoes and chili powder!)
3 carrots diced
1 tablespoon butter
1 teaspoon of ground cinnamon
1 teaspoon cayenne pepper
1 avocado diced
3 tomatoes diced
3 oz of sharp cheddar grated
4 taco shells
This recipe is pretty fool proof (always a plus!) First, cook rice. We use a rice cooker but the stovetop works just fine as well.
Brown ground beef and onions in a pan. Incorporate taco seasoning.
Salt and pepper the plantains and cook in a pan with some cooking spray until slightly brown. Flip and brown other side.
Blanche carrots in pot of hot water until slightly tender. Then, transfer to a pot with butter, cinnamon and cayenne pepper until carrots are cooked through.
Prepare toppings...
... and serve!
Not only was this meal simple but it incorporated a variety of textures and flavors. My favorite part was definitely the carrots - the cinnamon and cayenne paired perfectly, reminding me a bit of Mexican hot chocolate.
What do you serve with tacos? Do you focus on flavoring and enjoying the meat - or do you like to add all kinds of toppings?
Thursday, November 11, 2010
Guest Post: Cappuccino Toffee Brownie Cookies
I'm away on a cruise right now, and I've asked some of my favorite local bloggers to write guest posts for me. Today, Jen from Beantown Baker is sharing a recipe for some delicious brownie-like cookies. Jen bakes just as much, if not more than, I do. I'm always inspired by her recipes. We met way back at the Eggland's Best event, ran into each other at Myers + Chang, went on an incredible baking trip together, and most recently attended the Pie in the Sky kickoff party together. I hope you enjoy this recipe, and please check out Jen's blog when you have a chance!
Hi Delicious Dishings readers! My name is Jen from Beantown Baker. I am an engineer by day and a baker by night. I live with my Hubby and two cats in a tiny Boston condo. Hubby serves as my official taste tester for all the treats that I make in the kitchen. While I mostly blog about delicious baked goods, you'll also find savory meals, occasional travel or Boston posts, and even giveaways! The number one all time favorite thing I've made since I started blogging would have to be these Oreo Cupcakes. They're awesome. Enough about me, let's get on to these cookies.
When we were on our Boston blogger field trip to King Arthur Flour, I grabbed some cappuccino chips from their store. At the time I had no idea what I would use them for but they were unique enough that I had to have them. Then the other day I was in the mood for a chocolate cookie. I hit up my Google Reader to see what I had starred in there. That's when these cookies popped up. And I figured I'd use my cappuccino chips because they would pair well with toffee and chocolate.
Everyone really liked these cookies. In fact they were more like brownies. That's what Hubby and I ended up calling them. Whatever you call them, they're awesome. If you don't have cappuccino chips, use whatever you have on hand and I promise you'll love them!
Cappuccino Toffee Brownie Cookies - adapted from Megan's Cookin', originally from The King Arthur Flour Cookie Companion - makes 3 dozen
Printable Recipe
8 oz. bittersweet chocolate, coarsely chopped
2 Tbsp unsalted butter
3/4 cup light brown sugar
2 eggs
2 tsp vanilla extract
1/2 tsp baking powder
1/8 tsp salt
1/4 cup flour
1 cup toffee bits
1 cup cappuccino chips (or semi-sweet chips)
Preheat oven to 350 degrees. Lightly grease (or line with parchment paper) two baking sheets.
In the microwave or in a saucepan over very low heat melt the chocolate and butter together, stirring until smooth. Set the mixture aside to cool to lukewarm.
In a medium-sized bowl, beat together the brown sugar, eggs, vanilla, baking powder, and salt. Beat in the melted chocolate, then stir in the flour, toffee bits, and chocolate chips.
Drop the dough by the tablespoonful onto the prepared baking sheets. Bake the cookies for about 12 minutes or until the tops are cracked and dry, but the cookies are still soft to the touch. Don’t overbake these; they’ll become firm as they cool.
Remove the cookies from the oven and let them cool on the baking sheet for 10 minutes, then transfer them to a rack to cool completely.
Hi Delicious Dishings readers! My name is Jen from Beantown Baker. I am an engineer by day and a baker by night. I live with my Hubby and two cats in a tiny Boston condo. Hubby serves as my official taste tester for all the treats that I make in the kitchen. While I mostly blog about delicious baked goods, you'll also find savory meals, occasional travel or Boston posts, and even giveaways! The number one all time favorite thing I've made since I started blogging would have to be these Oreo Cupcakes. They're awesome. Enough about me, let's get on to these cookies.
When we were on our Boston blogger field trip to King Arthur Flour, I grabbed some cappuccino chips from their store. At the time I had no idea what I would use them for but they were unique enough that I had to have them. Then the other day I was in the mood for a chocolate cookie. I hit up my Google Reader to see what I had starred in there. That's when these cookies popped up. And I figured I'd use my cappuccino chips because they would pair well with toffee and chocolate.
Everyone really liked these cookies. In fact they were more like brownies. That's what Hubby and I ended up calling them. Whatever you call them, they're awesome. If you don't have cappuccino chips, use whatever you have on hand and I promise you'll love them!
Cappuccino Toffee Brownie Cookies - adapted from Megan's Cookin', originally from The King Arthur Flour Cookie Companion - makes 3 dozen
Printable Recipe
8 oz. bittersweet chocolate, coarsely chopped
2 Tbsp unsalted butter
3/4 cup light brown sugar
2 eggs
2 tsp vanilla extract
1/2 tsp baking powder
1/8 tsp salt
1/4 cup flour
1 cup toffee bits
1 cup cappuccino chips (or semi-sweet chips)
Preheat oven to 350 degrees. Lightly grease (or line with parchment paper) two baking sheets.
In the microwave or in a saucepan over very low heat melt the chocolate and butter together, stirring until smooth. Set the mixture aside to cool to lukewarm.
In a medium-sized bowl, beat together the brown sugar, eggs, vanilla, baking powder, and salt. Beat in the melted chocolate, then stir in the flour, toffee bits, and chocolate chips.
Drop the dough by the tablespoonful onto the prepared baking sheets. Bake the cookies for about 12 minutes or until the tops are cracked and dry, but the cookies are still soft to the touch. Don’t overbake these; they’ll become firm as they cool.
Remove the cookies from the oven and let them cool on the baking sheet for 10 minutes, then transfer them to a rack to cool completely.
Wednesday, November 10, 2010
Guest Post: Dessert Wines
I'm away on a cruise right now, and I've asked some of my favorite local bloggers to write guest posts for me. Today, Meghan from Travel, Wine, and Dine is sharing some dessert wine suggestions. I always turn to Meghan for wine advice -- in fact, the first time I met her was at a wine shop. She cooks great meals and pairs them with fabulous wines. I hope you enjoy her post. Please check out Meghan's blog when you have a chance!
Now that Halloween has passed, stores — not to mention the airwaves — will be overflowing with holiday cheer. Gifts will need to be purchased, meals planned, travel arrangements made. With everything on your plate, it is easy to not have time for the details, so I am here to help you with one delicious little detail, dessert wine. Dessert wine won’t make or break your holiday meal, but it could be a sweet addition or maybe even become a new tradition.
There are many options out there for dessert wine, from pricey Sauternes to one of my great-value favorites, Trader Joe’s Muscat, so I thought I would share just a few, paired with some popular holiday desserts.
Port- A fortified wine from Portugal, Port is common on dessert menus and is usually a sweet red wine, though there are drier Ports and also white Port. Port is great with chocolate, maybe a flourless chocolate cake. I haven’t tried it, but many people also enjoy Port with soft cheeses such as brie and camembert.
Sparkling Wine- Bubbly goes with just about everything. I really can’t think of a meal or occasion where I wouldn’t drink a little sparkling wine. Something like Mionetto Il Muscato is a great option for both the taste and the price and is tasty with richer desserts like cheesecake.
Late Harvest Wines – Made with grapes that have stayed on the vine longer than usual, late harvest wines are generally sweeter because, as they hang out on the vine, the grapes dehydrate, removing water and concentrating sugar and flavor. Some of my favorites include late harvest Zinfandel and Riesling. Some of these late harvest wines are great for drinking with fruit pies or tarts, very common holiday desserts. A nice, inexpensive option for late harvest wine is Hogue late harvest Riesling.
Dessert wines can be expensive, but a little does go a long way. They are usually consumed in smaller amounts; a big glass of dessert wine — like eating too much dessert — can be quite unpleasant!
So this holiday season, as you plan menus and get invited to holiday meals, don’t forget the dessert wine!
Now that Halloween has passed, stores — not to mention the airwaves — will be overflowing with holiday cheer. Gifts will need to be purchased, meals planned, travel arrangements made. With everything on your plate, it is easy to not have time for the details, so I am here to help you with one delicious little detail, dessert wine. Dessert wine won’t make or break your holiday meal, but it could be a sweet addition or maybe even become a new tradition.
There are many options out there for dessert wine, from pricey Sauternes to one of my great-value favorites, Trader Joe’s Muscat, so I thought I would share just a few, paired with some popular holiday desserts.
Port- A fortified wine from Portugal, Port is common on dessert menus and is usually a sweet red wine, though there are drier Ports and also white Port. Port is great with chocolate, maybe a flourless chocolate cake. I haven’t tried it, but many people also enjoy Port with soft cheeses such as brie and camembert.
Sparkling Wine- Bubbly goes with just about everything. I really can’t think of a meal or occasion where I wouldn’t drink a little sparkling wine. Something like Mionetto Il Muscato is a great option for both the taste and the price and is tasty with richer desserts like cheesecake.
Late Harvest Wines – Made with grapes that have stayed on the vine longer than usual, late harvest wines are generally sweeter because, as they hang out on the vine, the grapes dehydrate, removing water and concentrating sugar and flavor. Some of my favorites include late harvest Zinfandel and Riesling. Some of these late harvest wines are great for drinking with fruit pies or tarts, very common holiday desserts. A nice, inexpensive option for late harvest wine is Hogue late harvest Riesling.
Dessert wines can be expensive, but a little does go a long way. They are usually consumed in smaller amounts; a big glass of dessert wine — like eating too much dessert — can be quite unpleasant!
So this holiday season, as you plan menus and get invited to holiday meals, don’t forget the dessert wine!
Tuesday, November 9, 2010
Guest Post: Salted Cashew Crunch Cookies
I'm away on a cruise right now, and I've asked some of my favorite local bloggers to write guest posts for me. Today, Michelle from Fun and Fearless in Beantown is sharing a recipe for salted cashew crunch cookies. Don't they sound fabulous? I hope you enjoy the recipe and Michelle's post. She and I met at a viewing party at Rialto way back when Jody Adams was on Top Chef Masters and have been great friends ever since. I admire her creativity in the kitchen, and I'm so happy our trip to King Arthur has inspired her to bake more. Please check out Michelle's blog when you have a chance!
When Megan asked me to write a guest post for Delicious Dishings, I was extremely nervous. You see, I’m not much of a baker. While I enjoy cooking a lot, baking is typically very intimidating for me. But in September, Megan organized a lovely weekend of baking at King Arthur Flour Company and ever since then, I can’t stop trying out recipes from King Arthur Flour’s Whole Grain Baking cookbook! I started out with whole wheat bread…moved onto wheat baguettes…and I finally decided to try my hand at something a little more sweet.
When my friends at We Are Not Martha invited me to a small party a few weeks ago, I decided this was the perfect occasion to try out a new recipe from the cookbook – Salted Cashew-Crunch Cookies.
First, I got together my ingredients:
When Megan asked me to write a guest post for Delicious Dishings, I was extremely nervous. You see, I’m not much of a baker. While I enjoy cooking a lot, baking is typically very intimidating for me. But in September, Megan organized a lovely weekend of baking at King Arthur Flour Company and ever since then, I can’t stop trying out recipes from King Arthur Flour’s Whole Grain Baking cookbook! I started out with whole wheat bread…moved onto wheat baguettes…and I finally decided to try my hand at something a little more sweet.
When my friends at We Are Not Martha invited me to a small party a few weeks ago, I decided this was the perfect occasion to try out a new recipe from the cookbook – Salted Cashew-Crunch Cookies.
First, I got together my ingredients:
- ½ cup unsalted butter
- ¾ cup sugar
- ½ teaspoon salt
- ¼ teaspoon baking powder
- 1 teaspoon vanilla extract
- 1 large egg
- 2 cups old-fashioned rolled oats, ground for 30 seconds in a food processor
- 2 cups coarsely chopped cashews
- Extra-fine salt for topping
I first started out by preparing my rolled oats and cashews. I roughly chopped up the cashews on a cutting board and set the chopped nuts aside. I then put the two cups of rolled oats in a food processor and pulsed it for thirty seconds.
With all of my ingredients ready, I got to work on making the cookies. I preheated the oven at 350 degrees and lined two baking sheets with parchment paper. I first combined the butter, sugar, salt, baking powder, vanilla and egg in a bowl and beat the ingredients together.
I then beat in the ground oats.
And then slowly beat in the chopped cashews.
The texture of the dough was thick like granola. I took a tablespoonful of the dough, rolled it with my hands and placed it onto the baking sheet. In total, I rolled thirty balls of dough and sprinkled each ball of dough with a very light sprinkle of salt.
I then lightly greased the bottom of a drinking glass and used it to press the cookies down to about 3/8 inch thick.
I put both trays of cookies in the oven for about six minutes and then rotated the trays from the bottom and top racks of the oven. I let the cookies bake for another six minutes. The cookies weren’t quite golden brown so I shut the heat off the oven and left the trays in the oven for an additional three minutes. When the three minutes were up, I took the pans out of the oven and let the cookies cool right on the baking sheet.
I of course had to try a cookie as soon as it was cool enough and it had a nice crunchy texture with a slightest hint of salt. It was a crunchy cookie and not chewy at all because the recipe used absolutely no flour at all.
The next day, at the party, I gave the cookies another taste. I thought they were still pretty good but a tad dry. I think that the next time I make these cookies, I will take them out of the oven after the initial twelve minutes. I was definitely conservative in sprinkling salt on them and the cookies could have used a little more salt to truly get that salty crunchy taste.
Still, I’m proud of how the cookies turned out and I can’t wait to get back in the kitchen to see what else I can bake up! Thanks Megan for letting me share my latest adventures in baking with your readers!
Monday, November 8, 2010
Guest Post: Pumpkin Bread
I'm away on a cruise right now, and I've asked some of my favorite local bloggers to write guest posts for me. First up is Daisy. We all say that Daisy is the girl any of us would love to go out with on a Saturday night. She's so much fun, always has the best nail polish on, and I'm so happy we met way back at Mystery Meet No. 1. I wanted to make this pumpkin bread at some point myself, so I was so excited to see that Daisy made it for her guest post here. I hope you enjoy her post! And please check out Daisy's blog too!
Hi Delicious Dishings readers! My name's Daisy and I blog over at Indulge Inspire Imbibe. While Megan is cruising around the Caribbean, I've been busy in my kitchen. (Actually, I might be in Florida right now, depending on when this post goes up... put it this way, I was busy in my kitchen and Megan is currently on a cruise!)
The recipe I am going to share with you comes courtesy of the King Arthur Flour Whole Grain Baking Cookbook. As many readers may already know, Megan and I traveled to the King Arthur Flour Baking Education Center in Norwich, Vermont, with a group of bloggers back in September. I was never much of a baker, but the confidence I received in the baking class + this incredible cookbook + lots of KAF swag bag flour = I've since been baking up a storm!
This recipe yields a moist and golden loaf, scented with cinnamon, clove and nutmeg spices and filled with chocolate chips, and the star baking ingredient of the season: Pumpkin!
Pumpkin Bread
Preheat the oven to 350*F. Grease a 9 x 5-inch loaf pan.
2 cups (8 ounces) whole wheat flour
1 teaspoon baking soda
1/2 teaspoon baking powder
1/2 teaspoon salt
1/2 teaspoon cinnamon
1/2 teaspoon ground cloves
1/4 teaspoon ground nutmeg
1/2 cup ( 1 stick, 4 ounces) unsalted butter
1 cup packed light or dark brown sugar
1/4 cup granulated sugar
3 large eggs
1 teaspoon vanilla extract
1 cup canned pumpkin
3/4 cups chocolate chips (you could also use raisins, dried cranberries or chopped nuts, or a combo of both!)
Whisk together the first 7 ingredients in a medium bowl.
Cream together the butter and sugars in a large mixing bowl until light and fluffy.
Whisk in the eggs one at a time.
Whisk in the vanilla and pumpkin.
Add the dry ingredients, mixing until evenly moistened.
Stir in chocolate chips (or raisins, or cranberries or nuts. Go crazy!)
Pour the batter into prepared pan and bake until a toothpick inserted in the center comes out clean, about 1 hour. Let cool for 15 minutes, then run a butter knife around the edge of the pan, turn out the bread and place on a rack to finish cooling.
Happy Baking!!
Hi Delicious Dishings readers! My name's Daisy and I blog over at Indulge Inspire Imbibe. While Megan is cruising around the Caribbean, I've been busy in my kitchen. (Actually, I might be in Florida right now, depending on when this post goes up... put it this way, I was busy in my kitchen and Megan is currently on a cruise!)
The recipe I am going to share with you comes courtesy of the King Arthur Flour Whole Grain Baking Cookbook. As many readers may already know, Megan and I traveled to the King Arthur Flour Baking Education Center in Norwich, Vermont, with a group of bloggers back in September. I was never much of a baker, but the confidence I received in the baking class + this incredible cookbook + lots of KAF swag bag flour = I've since been baking up a storm!
This recipe yields a moist and golden loaf, scented with cinnamon, clove and nutmeg spices and filled with chocolate chips, and the star baking ingredient of the season: Pumpkin!
Pumpkin Bread
Preheat the oven to 350*F. Grease a 9 x 5-inch loaf pan.
2 cups (8 ounces) whole wheat flour
1 teaspoon baking soda
1/2 teaspoon baking powder
1/2 teaspoon salt
1/2 teaspoon cinnamon
1/2 teaspoon ground cloves
1/4 teaspoon ground nutmeg
1/2 cup ( 1 stick, 4 ounces) unsalted butter
1 cup packed light or dark brown sugar
1/4 cup granulated sugar
3 large eggs
1 teaspoon vanilla extract
1 cup canned pumpkin
3/4 cups chocolate chips (you could also use raisins, dried cranberries or chopped nuts, or a combo of both!)
Whisk together the first 7 ingredients in a medium bowl.
Cream together the butter and sugars in a large mixing bowl until light and fluffy.
Whisk in the eggs one at a time.
Whisk in the vanilla and pumpkin.
Add the dry ingredients, mixing until evenly moistened.
Stir in chocolate chips (or raisins, or cranberries or nuts. Go crazy!)
Pour the batter into prepared pan and bake until a toothpick inserted in the center comes out clean, about 1 hour. Let cool for 15 minutes, then run a butter knife around the edge of the pan, turn out the bread and place on a rack to finish cooling.
Happy Baking!!
Saturday, August 21, 2010
Guest Post: Fresh From New York's Union Square Farmer's Market
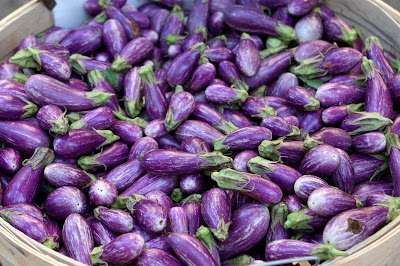
| Baby eggplant $5/lb |
My name is Christine. I write for Fresh Local and Best, which is a blog dedicated to discovery of good local ingredients at the farmers' market.
I write mostly out of New York, where we are lucky to have several markets dotted throughout the city. My favorite is the Union Square Farmer's Market, which is open Mondays, Wednesdays, Fridays, and Saturdays year round, an inspiring commitment by growers especially over the dark, frigid months of winter.
Heirloom tomatoes, $4.50/lb
Often I visit very early in the morning, when the farmers are still setting up. The market is quiet and calm, and everyone is in a good mood. It provides an opportunity to speak with your farmers, learn about their growing practices, and most importantly the chance to connect closer to your food.
Blueberries $6/pint
My favorite part of visiting any farmers' market is discovering something new. It seems like each year there is something new and exciting to try, and the farmers' markets simply get better and better as the movement for local and sustainable continues to gain ground. All across the nation, people are rediscovering the fresh flavors, textures, and varieties of produce as heirloom breeds reemerge out of obscurity.Heirloom tomatoes
Fresh coriander seeds, $2.50 per bunch
This year I discovered fresh coriander seeds at Gorzynski Ornery Farm, which make a dish come alive with their exotic spicy flavors. I used these coriander seeds in a green curry.Fennel Pollen, $2.50/bunch
Also from Gorzynski Ornery Farm was fresh fennel pollen that could be used to create a rub for a pork roast, which adds a hint of licorice flavor.
Scotch Bonnet chili, $5/lb
Kirby cucumbers $2/lb
Wherever I go in the world, I look forward to visiting the local markets because it tells me so much about their way of life, it tells me about their land, climate, seasons, culture, and the root of certain dishes.
I receive so much inspiration from the farmers' market that I can't help but attempt to capture the simple beauty of the colors, blushes, and shapes of fruits and vegetables displayed. Being surrounded by fragrant and gorgeous produce is invigorating to me, it awakens my senses and feeds my curiosity, creativity, and imagination.
Sweet corn, 5 for $2
Heirloom tomatoes from Windfall Farms, $5/pint
Multicolored radishes from Paffengroth Farms, $1/bunch
Everything is just so stunning in its natural beauty.
Green zebras, $4.50/lb
Rocambole garlic from Keith's Organic Farms, $2/bulb
Fresh garlic, $1/bulb
Fresh herbs from Keith's Organic Farms $2/bunch
Thanks for coming to visit the Union Square Farmer's Market with me. I hope you learned a few things about our part of the world here in New York and that you also have a greater appreciation of the farmers' market near you.
From Megan: Christine is my first guest poster. I really hope you enjoyed reading her post. I love her blog, pictures, and writing, so I was thrilled that she wanted to write a post for me on a topic I've been getting more and more into this summer. If you have time, check out more from Christine at Fresh Local and Best!
Subscribe to:
Posts (Atom)