Friday, December 18, 2009

Onion Soup Gratinee


Wintry weather had been sneaking in, as had my cravings for onion soup when, right on cue, a (free) review copy of the Culinary Institute of America's The New Book of Soups arrived on my doorstep.

As I do with any new cookbook, I immediately flipped through looking at all the pictures and recipe titles. The pictures are gorgeous, and there's quite a variety of different soups! I have another soup cookbook, but the pictures and recipes in this one easily blow it away. After being awed by the many delicious bowls of soup before me, I went back and read through the book more closely. It's divided into chapters (following the first one on soup basics) by soup type, moving from broths, hearty soups, stews, and cream soups to pureed soups, bisques and chowders, and, finally, cold soups. The last chapter is about soup accompaniments.

In the soup basics chapter, I learned that soup pots should be taller than they are wide. This is so less of the soup evaporates. I also learned some time-saving tips, one of which I employed below. And I found a great chart on soup ingredients. I couldn't wait to delve right into the recipes after preparing by reading the soup basics chapter.

There's not much that can beat a hearty, warm bowl of a soup on a cold winter's night. I don't know about where you live, but here, the temperatures have been dropping quickly, too quickly if you ask me. But cold weather also means soup weather, so that's definitely some consolation.

While I considered making the classic lentil soup or the minestrone for my first recipe from The New Book of Soups, I knew what I really wanted was onion soup with a hunk of bread and cheesy topping. The onion soup gratinee can be found in the broths chapter.

Really, I should have made my own beef broth because The New Book of Soups includes a basic method for broths and broth recipes, but since I saw that using prepared broth was an acceptable time-saver, I cheated and bought the prepackaged stuff. I also took another shortcut and used a premade bouquet garni from O&Co. It contained thyme, bay leaves, savory, and oregano, which I thought would work as a substitute for the herbs called for in the recipe. And the last difference between my soup and the recipe below is that I thought I had brandy at home so I didn't pick any up. I was mistaken, but I made the soup anyways, sans brandy. I think the brandy would help to add another layer of flavor. Next time I make a soup, I'm definitely going to do it completely from scratch using the guidance in this book.


Onion Soup Gratinee (from The New Book of Soups, reprinted with permission)
Makes 8 servings

Ingredients
1/4 cup olive or vegetable oil
5 cups thinly sliced onions
1 tsp minced garlic
1/2 cup brandy
1 1/2 qt Beef or Chicken Broth, heated (page 16, 15)
Sachet: 3 to 4 parsley stems, 1/2 tsp each dried thyme and tarragon, 1 bay leaf enclosed in a large tea ball or tied in a cheesecloth pouch
Salt as needed
Freshly ground black pepper as needed
8 slices French bread
1 cup grated Gruyere cheese, or as needed

Preparation
  1. Heat the oil in a soup pot over medium-low heat. Add the onions and cook without stirring until the onions begin to brown on the bottom. Raise the heat to medium, stir, and continue to cook, stirring occasionally, until the onions are deeply caramelized (dark golden brown). The total cooking time will be 40 to 45 minutes. If the onions begin to scorch, add a few tablespoons of water and continue cooking.
  2. Add the garlic and continue to cook for an additional minute. Add the brandy and simmer until the liquid has nearly evaporated, 2 to 3 minutes.
  3. Add the broth and sachet. Bring to a simmer and cook, partially covered, for 45 minutes to 1 hour, skimming the surface as necessary and discarding the fat. Remove and discard the sachet. Season to taste with salt and pepper.
  4. When ready to serve the soup, preheat the oven to 350°F and bring 2 quarts of water to a boil. Ladle the soup into individual oven-proof crocks. Top each with a slice of bread and sprinkle with the grated cheese, covering the bread completely and allowing the cheese to touch the edge of the crock.
  5. Set the soup crocks in a baking dish and add enough boiling water to the baking dish to reach two-thirds up the sides of the crocks. Bake until the soup is thoroughly heated and the cheese is lightly browned, 10 to 15 minutes. Serve immediately.

Soup ingredients


Sliced onions
(It's best to employ a boyfriend who is surprisingly skilled at using a mandoline for this part. Even though he'd never used it before, he was 10 times faster than me and never came close to losing any fingers. Slicing by hand would take quite a while. And me using a mandoline is out of the question -- my mandoline and I have had way too many close calls!)


Finished soup


Soup ladled into bowls


Bread and cheese


Soup topped with bread and cheese


All toasty and ready to be eaten!
(Even though the recipe doesn't suggest it, I had to turn on my broiler in the end to get the cheese browned and melted the way I like it.)

I'm thinking about making a stew this weekend -- we're expecting snow!

What is your favorite kind of soup?

Onion Soup Gratinee on Foodista

Thursday, December 17, 2009

Sausage, Pepper and Potato Soup (stew or stoup)


I can't help but chuckle at the title because I know that a lot of my readers and blogger friends despise Rachael Ray.  I know she's quirky and annoys people but that doesn't stop me from trying her recipes and it shouldn't stop you either. I like her and more importantly, this dish is delicious!  I added a potato and handful of Trader Joe's frozen sliced peppers (in addition to the cubanelle's), a can of roman beans, some crushed red pepper (since I didn't use spicy sausage) and Italian seasoning.  I loved it!  I can't wait to eat the leftovers for lunch today!


Sausage, Pepper and Potato Soup

http://www.foodnetwork.com/recipes/rachael-ray/sausage-peppers-and-onions-stoup-recipe/index.html

Ingredients:


3 tablespoons extra-virgin olive oil
1 1/2 pounds hot or sweet Italian sausage, cut into small pieces or smashed with a masher or spoon
6 cloves garlic, finely chopped
3 to 4 cubanelle peppers, seeded and thinly sliced
2 medium-large onions, thinly sliced
1 large potato, diced
2 tablespoons balsamic vinegar
2 cups chicken stock
2 (15-ounce) cans or 1 (28-ounce) can crushed or diced fire roasted tomatoes
1 can roman beans, drained and rinsed
1/4 cup finely chopped parsley leaves
1/2 cup basil leaves, torn
1 tsp Italian seasoning
crushed red pepper to taste (if you use spicy sausage you don't need this)
1 cup Romano cheese

Directions:

Heat extra-virgin olive oil in deep skillet, add sausage and brown a few minutes then add potato, garlic, peppers, onions and cook until soft, 6 to 7 minutes more.

Deglaze pan with vinegar abd stir in stock, tomatoes, basil, Italian seasoning and crushed red pepper.  Bring to a boil then reduce heat to simmer, cook 10 -15 minutes and then add beans and cook for another 5-10 minutes until potatoes are tender.  Season with salt and pepper to taste.  Serve with grated cheese on top.


12 DAYS & SOFT AND CHEWY CHOCOLATE CHIP COOKIES


Have you ever felt hunger? I mean true hunger, the desperate type where it was the result of not having enough around? I'll share with you some personal insight, not mine but a close friend's. On very rare occasions he will open up and recount his painful memories of going to bed hungry. He would tell me, "It was only a matter of $3, if someone could have spared $3, I would have been able to get something to eat."

continue reading...

Wednesday, December 16, 2009

Bûche De Noël, Or Rather Stump De Noël


Bûche de Noëls (or is it bûches de Noël?) are stunning, versatile holiday desserts, and I happen to be obsessed with them this year. This out-of-the-blue desire to craft and eat bûche de Noëls would not be suppressed: Every food magazine I opened stoked that desire. Entertaining from Cook's Illustrated (Holiday 2009) features a simple roulade, Bon Appetit (December 2009) offers a super quick and easy no-bake Yule log, Martha Stewart Holiday has roulades ranging from pistachio to cranberry to peppermint, and Food & Wine (December 2009) exhibits what I consider the most impressive: the stump de Noël.

So being the ambitious baker I am, I started at the top with the stump de Noël featured in Food & Wine. The recipe comes from the owners of Baked (a Brooklyn bakery), who make the stump for an annual holiday potluck for staff who have to work during the holidays.

Their version, which is on Food & Wine's Web site, calls for malt powder and crushed malt balls, but because I couldn't find malt powder, I improvised and made chocolate buttercream for both the filling and the frosting.

stump de Noel
Chocolate Stump de Noël (adapted from Baked and Food & Wine, December 2009)

Ingredients

1 cup all-purpose flour, plus more for dusting
1/4 cup unsweetened cocoa powder, sifted
1/4 teaspoon salt
12 ounces bittersweet chocolate, melted and cooled
2 tablespoons instant espresso powder dissolved in 1/4 cup of hot water
1 dozen large eggs, at room temperature, separated
1 1/3 cups sugar
1 tablespoon plus 1 teaspoon pure vanilla extract
1/4 teaspoon cream of tartar
6 tablespoons unsalted butter, melted
Chocolate buttercream (recipe below)
Meringue mushrooms (recipe below)
Sugared cranberries and rosemary sprigs (recipe below)
Chocolate splinters (recipe below)

Directions

Preheat the oven to 350°. Butter two 12-by-17-inch rimmed baking sheets and line them with parchment paper, leaving a 1-inch overhang on all of the short sides. Butter the paper and dust with flour.

In a small bowl, whisk the 1 cup of flour with the cocoa and salt. In another small bowl, combine the chocolate and espresso. In the bowl of a standing electric mixer, combine the egg yolks with 2/3 cup of the sugar. Set the bowl over a pan of simmering water and whisk until the sugar is dissolved. Transfer the bowl to the mixer fitted with the whisk and beat at high speed until the yolks are pale and thick, about 5 minutes. Beat in the melted chocolate mixture along with the vanilla. Transfer to a large bowl.

chocolate and egg mixture
Thoroughly wash and dry the mixer bowl and the whisk. Beat the egg whites with the cream of tartar on moderately high speed until soft peaks form. Gradually add the remaining 2/3 cup of sugar and continue beating at high speed until the whites are glossy, about 2 minutes longer.
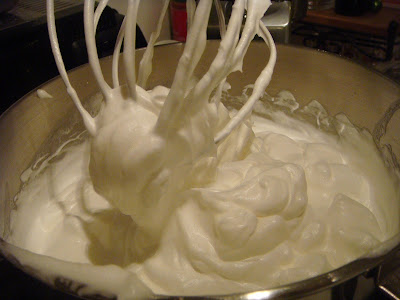
egg whites
Whisk one-fourth of the egg whites into the cake batter, then fold in the remaining whites until no streaks remain.

In a small bowl, whisk the melted butter with 1/2 cup of the batter; fold this mixture into the batter. Working in 2 batches, sift the cocoa powder mixture over the batter and gently fold it in.

cake batter
Divide the batter between the prepared pans, spreading it out to fill the pans.

cake batter in baking pan
Bake for about 18 minutes, until the cake feels springy and dry; shift the pans from top to bottom and front to back halfway through baking. Transfer the pans to racks to cool completely.

baked cakes
Run the tip of a knife around the edges, cover with parchment paper and a baking sheet and invert; peel off the parchment on top.

Spread the chocolate buttercream over the cakes, reserving about 1 1/2 cups for frosting.

spreading buttercream on cakes
Using a ruler, cut each cake precisely in half lengthwise, cutting through the paper; you should have four 6-by-17-inch strips of cake.

cakes cut in half lengthwise
Roll one strip into a tight coil, leaving the paper behind. Roll the 3 remaining cake strips around the coil in the same way to form a very wide, short jelly roll. Set the cake on a large plate, spiraled end up.

rolled cake
Frost the outside of the cake with the remaining chocolate buttercream.

frosting cake
Refrigerate until set, at least 8 hours.

frosted and trimmed cake
Decorate the cake with meringue mushrooms, cranberries and rosemary sprigs and serve, cutting the cake into wedges or horizontal slices.


Make Ahead
The chocolate stump cake can be refrigerated for up to 4 days. Let the cake stand at room temperature for 1 hour before serving.


Chocolate Buttercream

Ingredients

5 large egg whites, at room temperature
1 1/2 cups sugar
1 teaspoon pure vanilla extract
4 sticks (1 pound) unsalted butter, at room temperature
16 ounces bittersweet chocolate, melted and cooled

Directions

In the bowl of a standing electric mixer, combine the egg whites and sugar. Set the bowl over a pot of simmering water and whisk until the sugar is dissolved and the egg whites are just warm to the touch. Return the bowl to the mixer fitted with the whisk. Add the vanilla and beat the egg whites at high speed until firm and glossy, about 5 minutes. With the machine on, whisk in the butter a few tablespoons at a time. If the mixture begins to look curdled, continue to beat until smooth before adding more butter. Whisk in the melted chocolate.

Make Ahead
The chocolate buttercream can be refrigerated, covered, overnight. Let the frosting return to room temperature before using.


Garnishes

garnishes
Meringue Mushrooms (adapted from Martha Stewart's Cupcakes)

meringue mushrooms atop cake
Ingredients

Swiss Meringue

    4 large egg whites, at room temperature 1 cup sugar 1 pinch cream of tartar 1 teaspoon pure vanilla extract

3 ounces, white chocolate, chopped finely

Directions

Combine egg whites, sugar, and cream of tartar in the heatproof bowl of electric mixer, and set over a pan of simmering water. Whisk constantly until sugar is dissolved and whites are warm to the touch, 3 to 3 1/2 minutes. Test by rubbing between your fingers.

Transfer bowl to electric mixer fitted with the whisk attachment, and whip, starting on low speed, gradually increasing to high until stiff, glossy peaks form, about 10 minutes. Add vanilla, and mix until combined.

Swiss meringue
Preheat oven to 200 degrees. Line rimmed baking sheets with parchment paper; set aside.

Place meringue in a pastry bag fitted with a small plain tip (#6). Pipe domes, 1/2 inch to 2 inches in diameter, onto prepared baking sheets, and flatten the tips with a damp forefinger. Pipe stems onto baking sheets, releasing pressure halfway and pulling up to form a peak, making one to go with each "cap."

piped mushrooms
Bake the meringue shapes for 1 hour, rotating baking sheets halfway through. Reduce oven temperature to 175 degrees. Continue baking until completely dry to the touch but not browned, 45 to 60 minutes.

baked meringue mushrooms
Melt white chocolate in a small bowl (in microwave or use double boiler). Using a paring knife, make a small hole in center of each cap. Dip one end of each stem in white chocolate, and insert into a hole; let set.

meringue mushroom

Store in airtight containers in a cool, dry place up to 1 week. When ready to use, sprinkle with cocoa powder, if desired.

Sugared Cranberries And Rosemary (adapted from Martha Stewart Holiday)

sugared cranberries and rosemary
Ingredients

1 1/4 cups sugar
1 cup water
1/2 cup (or more) cranberries
5-12 rosemary sprigs

Preparation

In a small saucepan, bring water and 1 cup sugar to a boil over medium-high heat, and stir until sugar dissolves. Pour simple syrup into a bowl.

Pour remaining 1/4 cup sugar into another bowl.

Drop a handful of cranberries into the simple syrup. Remove cranberries with a slotted spoon, letting excess simple syrup drain off. Drop cranberries into bowl of sugar, and toss with a fork. Place sugared cranberries on parchment. Repeat until all cranberries are sugared.

Dip rosemary sprigs in simple syrup and then in sugar. Place on parchment to dry.

Chocolate Splinters (adapted from Martha Stewart Holiday)

Melt 4 ounces of finely chopped bittersweet chocolate in small bowl in microwave. Spread the melted chocolate 1/8-inch thick over parchment-lined baking sheet. Chill 10 to 15 minutes. Cut hardened chocolate into splinters.

And now for my notes on the whole process...

I didn't have any 12-by-17-inch baking sheets. I'd never seen a recipe call for that size pan before and thought they might be difficult to find, but Macy's carries Calphalon and Martha Stewart brand ones, so that problem was easily remedied.

We didn't think to match up the edges of the cake, so there were ends and middles together and the top looked a little sloppy. We just sliced horizontally through the cake removing the top inch. This is also a great way to get to taste the cake since you can't really cut into it before serving it to people.

trimmed cake
For the meringue mushrooms, I used the recipe from Martha Stewart's Cupcakes, which was almost the same as the one in the Martha Stewart Holiday magazine except it called for 1/2 teaspoon more of vanilla and said the mushrooms could be stored longer. So much for consistency, Martha. I did not spread chocolate under the mushroom caps to make them look more like real mushrooms as the recipe instructed -- I was already spending a ton of time on this dessert. When piping the mushrooms, do not worry about making the stems dainty. Many of my mushrooms did not stand up because I didn't pipe the stems thickly enough.

For the sugared cranberries, Martha Stewart says to put one cranberry at a time on a toothpick, dip it in simple syrup, roll it in sugar, remove it from the toothpick, and then move on to the next cranberry. If I didn't work 56 hours a week, maintain a blog, and attempt to maintain a life, perhaps I would have tried to do it that way. I think you'll find the method I've given you above to be much more efficient! (By the way -- these are delicious!)

For timing purposes, I made the meringue mushrooms on Wednesday night and the buttercream on Thursday night and stored it in the fridge. I baked and assembled the cake (with a lot of help from my boyfriend) on Friday night -- I took the buttercream out of the fridge before starting the cake so it could soften. Finally, I made the sugared cranberries and rosemary on Saturday night while my boyfriend chopped chocolate shards for me, and then we decorated the stump and plate.

I happen to be pretty clumsy and cut my finger while chopping some scallions for dinner the night I planned to assemble the cake. I wasn't doing much better later that evening when it was time to roll the cake into a stump. Luckily, my boyfriend swooped in, finished making dinner, and helped me roll and frost the stump de Noël. I would probably still be sitting in a pile of broken cake, tears streaming down my face, if he hadn't been there to help.

All in all, I was incredibly happy with the way the stump turned out. I loved making all the garnishes, trying my hand at the different decorations. Besides that I thought the cake was a smidge too dry (I'm a very touch critic when it comes to my own baked goods), it was delicious. I brought it to a friend's holiday party. She cut tall, thin slivers of cake for everyone. I wish I had an inside picture to show you -- the slices had a sort of wood grain to them that was really cool.

If you're looking for a great dessert to bring to an upcoming holiday party and you have a little time on your hands, I think this one is incredibly festive and perfect for such an ocassion.

Have you ever made a bûche de Noël?

Buche De Noel on Foodista

Chicken Salad


I've never made chicken salad before this weekend.  I don't know why, maybe it's because I'm not a big fan of tons of mayonaisse.  I don't mind a little on my sandwich but potato salads that have a ton of it or tuna that is swimming in it, I don't know, it grosses me out.  This definitely has mayo in it but it's cut by sour cream and it's so much better than all mayo.  Trust me.  The chicken is roasted instead of poached and what a difference it makes.  Throw in some extra breasts and save the chicken for other recipes.  I did and it's come in handy already. The recipe is by Ina Garten's and I made a couple of small changes.  I'll post what I did here and you can click on the link for the original recipe.


Chicken Salad

http://www.foodnetwork.com/recipes/chicken-salad-contessa-recipe/index.html

Ingredients:


2 split (1 whole) chicken breasts, bone in, skin on (1 1/2 pounds)
olive oil
Kosher salt and freshly ground black pepper
1/2 cup pecan halves (or walnuts)
2 stalks celery, diced
1/2 cup light mayonnaise
1/2 cup light sour cream
1 tablespoon dijon mustard
1 tablespoon chopped fresh parsley
¼ cup scallions or chives
1 cup green or red grapes, cut in half
Lettuce leaves, for serving

Directions:

Preheat the oven to 350 degrees F.

Place the chicken breasts, skin side up, on a baking sheet and rub them with olive oil. Sprinkle generously with salt and pepper. Roast for 35 to 40 minutes, until the chicken is cooked through. Set aside until cool.

When the chicken is cool, remove meat from the bones and discard the skin and bones. Shred the chicken with two fork or with your fingers.
Meanwhile, toast the pecans in a pan and set aside to cool.

For the dressing, mix together the mayonnaise, sour cream and mustard.  Add salt and pepper to taste . Fold in parsley and chives.

Place the shredded chicken in a bowl, add the pecans, walnuts and grapes. Pour the dressing over the chicken and toss well.  Serve on a bed of lettuce leaves.


Tuesday, December 15, 2009

Cookie Monster

I did some baking for a few cookie care packages last Saturday, and thought I'd share the loot ;) It took awhile to figure out what to make, but I finally decided on a few new varieties and challenged myself to come up with one of my own.

clockwise, from bottom R: Chevre cookies, Blueberry Lavender Butter Cookies, Seven Layers, Chocolate Candy Cane Cookies and Persimmon Cookies

To accompany the Seven Layers that everyone loves, I tried a few cookies from fellow bloggers. I think my favorite one was Nicole's Persimmon Cookies, but Elise's Chocolate Candy Cane Cookies did not disappoint. I used my usual substitutions-- white whole wheat flour for AP and Smart Balance 50/50 sticks for the butter/shortening. In the Chocolate cookies, I used Candy Cane Kisses instead of Peppermint Bark, since I already had them. There was one other variety in there that I didn't really like as a Christmas cookie, but I sent it out anyways (sorry guys!). I think they would find a better home on a cheese tray....

For my own recipe, I took a cue from some muffins Kelly turned me on to this summer. Into a butter cookie base, I added some lavender buds (a free sample from Marx Foods), dried blueberries and a little lemon zest. Different, but I really liked them :) On a side note, I wasn't sure if these were a butter cookie or shortbread. Anyone know the difference??

Blueberry Lavender Butter Cookies

Blueberry Lavender Butter Cookies
Recipe by Shannon


1 1/4c white whole wheat flour
1/8t salt
1 stick of butter, room temp (I used Smart Balance 50/50 sticks)
1/2c plus 2T powdered sugar
1 lg egg
1t lavender buds
1c dried blueberries, chopped
zest of 1/2-1 lemon

Beat butter until light and creamy in a stand mixer (or by hand). Add in powdered sugar over a few additions. Once incorporated, beat in egg. With the mixer running on low, add flour and continue to mix until well combined. Fold in lavender (crush with your fingers while adding to the batter), blueberries and lemon zest. Transfer to a large piece of saran wrap and shape into a log. Refrigerate a few hours or overnight.

Preheat oven to 350deg. Line cookie sheet (1 large one or two smaller ones) with parchment paper. Remove dough from fridge and make 1/4" slices (unwaxed floss could be used, but I just used my chef's knife). Place on baking sheet and bake 12-13min, until just starting to brown on the edges. Remove and cool on a rack.

*My note: I did not chop my blueberries, so when I tried to cut them the blueberries got in the way and they fell apart. I just shaped the cookies by hand and that worked well!*


I'm sending these to Susan for her Christmas Cookie Roundup! Click here to find out how to submit your own recipe (hurry, time's running out!), and click here for the roundup and more ideas!

Hash Brown Quiche


I don't usually make many Paula Deen recipes but over the weekend I made two.  This quiche made with a hash brown crust was a big hit with my friends.  I'll definitely make it again for breakfast or brunch.  I followed the recipe exactly as written with one exception.  I used one whole bag of refrigerated shredded potatoes (Simply Potatoes) instead of frozen.  This was recommended by some reviewers on the food network website.  I like my potatoes to be a little darker so I put it under the broiler in addition to the recommended cooking time.  It turned out perfectly.

Hash Brown Quiche

http://www.foodnetwork.com/recipes/paula-deen/hash-brown-quiche-recipe/index.html

Ingredients:


3 cups, shredded frozen hash browns, thawed and drained
4 tablespoons (1/2 stick) butter, melted
3 large eggs, beaten
1 cup half-and-half
3/4 cup diced cooked ham
1/2 cup diced green onions
1 cup shredded Cheddar
Salt and freshly ground black pepper

Directions:

1. Preheat oven to 450 degrees F.

2. Gently press the drained hash browns between paper towels to dry them as best as possible. In a 9-inch pie plate, toss the hash browns with the melted butter into the plate. Press them into the bottom and up the sides to form a crust. Bake for 20 to 25 minutes until golden brown and starting to crisp.

3. Meanwhile, in a large mixing bowl, combine the remaining ingredients. When the hash brown crust is ready pour the egg mixture over it and return to the oven.

4. Lower the oven temperature to 350 degrees F and bake for about 30 minutes until the quiche is light golden brown on top.