Showing posts with label Holiday - Easter. Show all posts

Monday, April 25, 2011

Easter Sunday On The Cape


Hope you all had a wonderful Easter (or a wonderful Sunday if you don't celebrate Easter)! We sure did! Jeff and I got up bright and early on Sunday morning and headed down to the Cape to meet up with my family (who drove up from CT). Both of my sisters were home from school (one from Pittsburgh and one from Ithaca), so it was especially nice to see them, along with my parents, my little brother, and the dogs. We spent the day coloring eggs, playing games, and, of course, feasting. The weather was absolutely gorgeous, and we couldn't have asked for a better day. Pictures say it best, so here goes...

I love that first glimpse of the Bourne Bridge on the way to the Cape.


The Easter Bunny brought me a little something!
Can't wait to try the dark chocolate balsamic vinegar.

Let the egg coloring begin!


So proud of our handiwork

Playing cards

Easter ham

Potato pave -- recipe coming soon


Mud turtle cupcakes -- recipe coming soon


My sister's birthday was last Tuesday so we celebrated that too.
She was actually born on Easter morning... 19 years ago.

Unfortunately, all good things must come to an end.
We made our way back to Boston in the rain and traffic.
I had such a great time visiting with my family and taking in a little sunshine. We don't really have anywhere to sit outside and just chill, so I always appreciate being able to go either of our parents' houses or to the Cape, where we can do that.

We've got a fridge stocked with leftovers as well as a split pea soup my mom threw together for me, using the ham bone. We also have a lot of hardboiled eggs to eat!

What was your favorite part of the weekend?

Thursday, April 21, 2011

Hot Cross Buns


Hot cross buns are sweet, cinnamon-scented rolls, chock-full of dried fruit, and topped with an icing cross. They are traditionally eaten on Good Friday, but they'd be a great addition to Easter brunch as well.

Jen from Beantown Baker and I made these buns together during our last baking date. Like most yeast breads, you must give the dough time to rise, shape it, and let it rise again before baking.

Hot Cross Buns (adapted from King Arthur Flour)

Ingredients

Buns
1/4 cup rum (or apple juice)
1/2 cup mixed dried fruit
1/2 cup raisins or dried currants
1 1/4 cups milk, room temperature
2 large eggs
1 egg yolk (reserve white for topping)
6 tablespoons butter, room temperature
2 teaspoons instant yeast
1/4 cup light brown sugar, firmly packed
1 teaspoon ground cinnamon
1/4 teaspoon ground cloves or allspice
1/4 teaspoon ground nutmeg
1 3/4 teaspoons salt
1 tablespoon baking powder
4 1/2 cups flour

Topping
1 large egg white, reserved from above
1 tablespoon milk

Icing
1 cup + 2 tablespoons confectioners' sugar
1/2 teaspoon vanilla extract
pinch of salt
4 teaspoons milk, or enough to make a thick, pipeable icing

Preparation

Generously grease a 9-by-13-inch baking pan.

Measure the rum and dried fruit and raisins into a small bowl. Cover with plastic, and microwave for about 30 seconds, or just until the fruit and liquid are very warm. Leave covered, and set aside to cool to room temperature. Note: If you worry about using plastic wrap in your microwave, simply cover the bowl with a glass lid.


Mix together all of the dough ingredients except the fruit, and knead, using an electric mixer fitted with dough hook until the dough is soft and elastic. Mix in the fruit and any liquid.


Cover the dough, and let it rise for 1 hour. It should become puffy, but it may not double in bulk.

Using a muffin scoop, scoop out equal portions of dough, and roll them into balls with well-greased hands on a well-greased countertop.


Line them up in the prepared pan.


Cover the pan, and let the buns rise for 1 hour, or until they've puffed up.


While the dough is rising, preheat the oven to 375°F.

Whisk together the reserved egg white and milk, and brush it over the buns.

Bake the buns for 20 to 25 minutes, rotating pan halfway through, until they're golden brown. Remove from the oven, and transfer to a rack to cool.

Mix together the icing ingredients, and when the buns are completely cool, pipe a cross atop each bun.


Have you ever had hot cross buns?

Wednesday, April 20, 2011

Chocolate-Coconut Nests With Jelly Bean Eggs


I was having a little too much fun in the kitchen the other night -- so much fun I felt transported back to elementary school. Making these Easter-themed nests is very similar to an elementary school art project. They're messy and they require very few ingredients and not too much coordination. They also challenge you to just let go and not be too much of a perfectionist.

These nests came together on a whim. I had an open bag of coconut after making the carrot-coconut scones, and we had some jelly beans in the house after a recent jelly bean craving prompted us to buy two bags of them. And you know me, I always have chocolate in the house. And guess what? Coconut, jelly beans, and chocolate are the only ingredients you need. (Unless of course you are feeling super silly and have some bunny sugar decorations on hand. Then you can add those to the nests -- you know, because the Easter Bunny could be getting ready to hide those eggs for an Easter egg hunt.)


Chocolate-Coconut Nests With Jelly Bean Eggs

Ingredients

10 ounces sweetened coconut
10 ounces milk or dark chocolate, chopped (I used Lindt milk chocolate)
Jelly beans
Bunny sugar decorations (optional)

Preparation

Preheat oven to 325 degrees. Line a sheet pan with parchment, and spread the coconut out on the pan. Toast coconut in preheated oven for 15 to 20 minutes, stirring or tossing it every 5 minutes. Remove from oven, and let cool slightly.


Place chocolate in a medium microwave-safe bowl, and microwave for 1 minute. Stir, and continue microwaving in 30-second increments until chocolate is melted and completely smooth.

Line a couple of sheet pans with parchment paper, and have your jelly beans at the ready.

Transfer toasted coconut to a large bowl, and stir in the melted chocolate. Mix until coconut is completely coated in chocolate.


Using a cookie scoop, place scoops of the chocolate-coconut mixture on the sheet pans. Use the back of the scoop to make a small hollow in the middle of each nest. (If the nests spread out too much, you can squish them back together a little, but this is the part where you have to relax and put the perfectionism aside.) Place three to five jelly beans in each nest (and tuck a bunny sugar decoration in each nest if desired).


Transfer sheet pans to fridge, and let nests firm up, about 1 hour. (Store in an airtight container in fridge.)


These quick and easy treats are not only the perfect after-Easter-dinner sweet, but they also make adorable Easter decorations. Not to mention they could be a fun Easter morning family project. Little kids (and big kids, speaking from personal experience) would have so much fun molding the little nests and tucking jelly beans into them.

Tuesday, April 19, 2011

Homemade Peeps


Jen and I had another baking date a few weeks ago, and we decided to try to recreate that well-known Easter treat: Peeps! I find that people either love Peeps, love stale Peeps, or steer clear of them. I fall into the second category. Give me a box of Peeps that has been sitting open for a week, and I'm a happy girl. Homemade Peeps, however, changed my mind a bit. I even liked them fresh.

Jen found a recipe for marshmallow for piping and some pictures detailing how to create Peeps. While we started out thinking we might make chicks and bunnies, we had enough fun just trying to make chicks that looked like chicks that we never got to the bunnies.

We both agreed that creating the Peeps would have been easier if we could have found a video showing us how to make them, so we created a video to make it easy for you to learn how to make Peeps (see below).


Homemade Peeps (adapted from Martha Stewart Living and Serious Eats)

Ingredients

1 packet (2 1/2 teaspoons) unflavored gelatin
1/3 cup cold water, for gelatin
1/4 cup cold water, for syrup
1 cup sugar
1/4 teaspoon vanilla
Pinch of salt
Colored sugars

Preparation

Line a sheet pan with parchment paper or foil, and set aside (you'll place your finished Peeps on it).

In bowl of electric mixer, sprinkle gelatin over 1/3 cup cold water. Allow gelatin to soften, about 5 minutes.

In a small saucepan, combine 1/4 cup water and sugar, and stir over medium-high heat until sugar is dissolved. Stop stirring, and place a candy thermometer into sugar water. Boil sugar until temperature reaches the soft-ball stage (238 degrees). Stir in vanilla and salt.

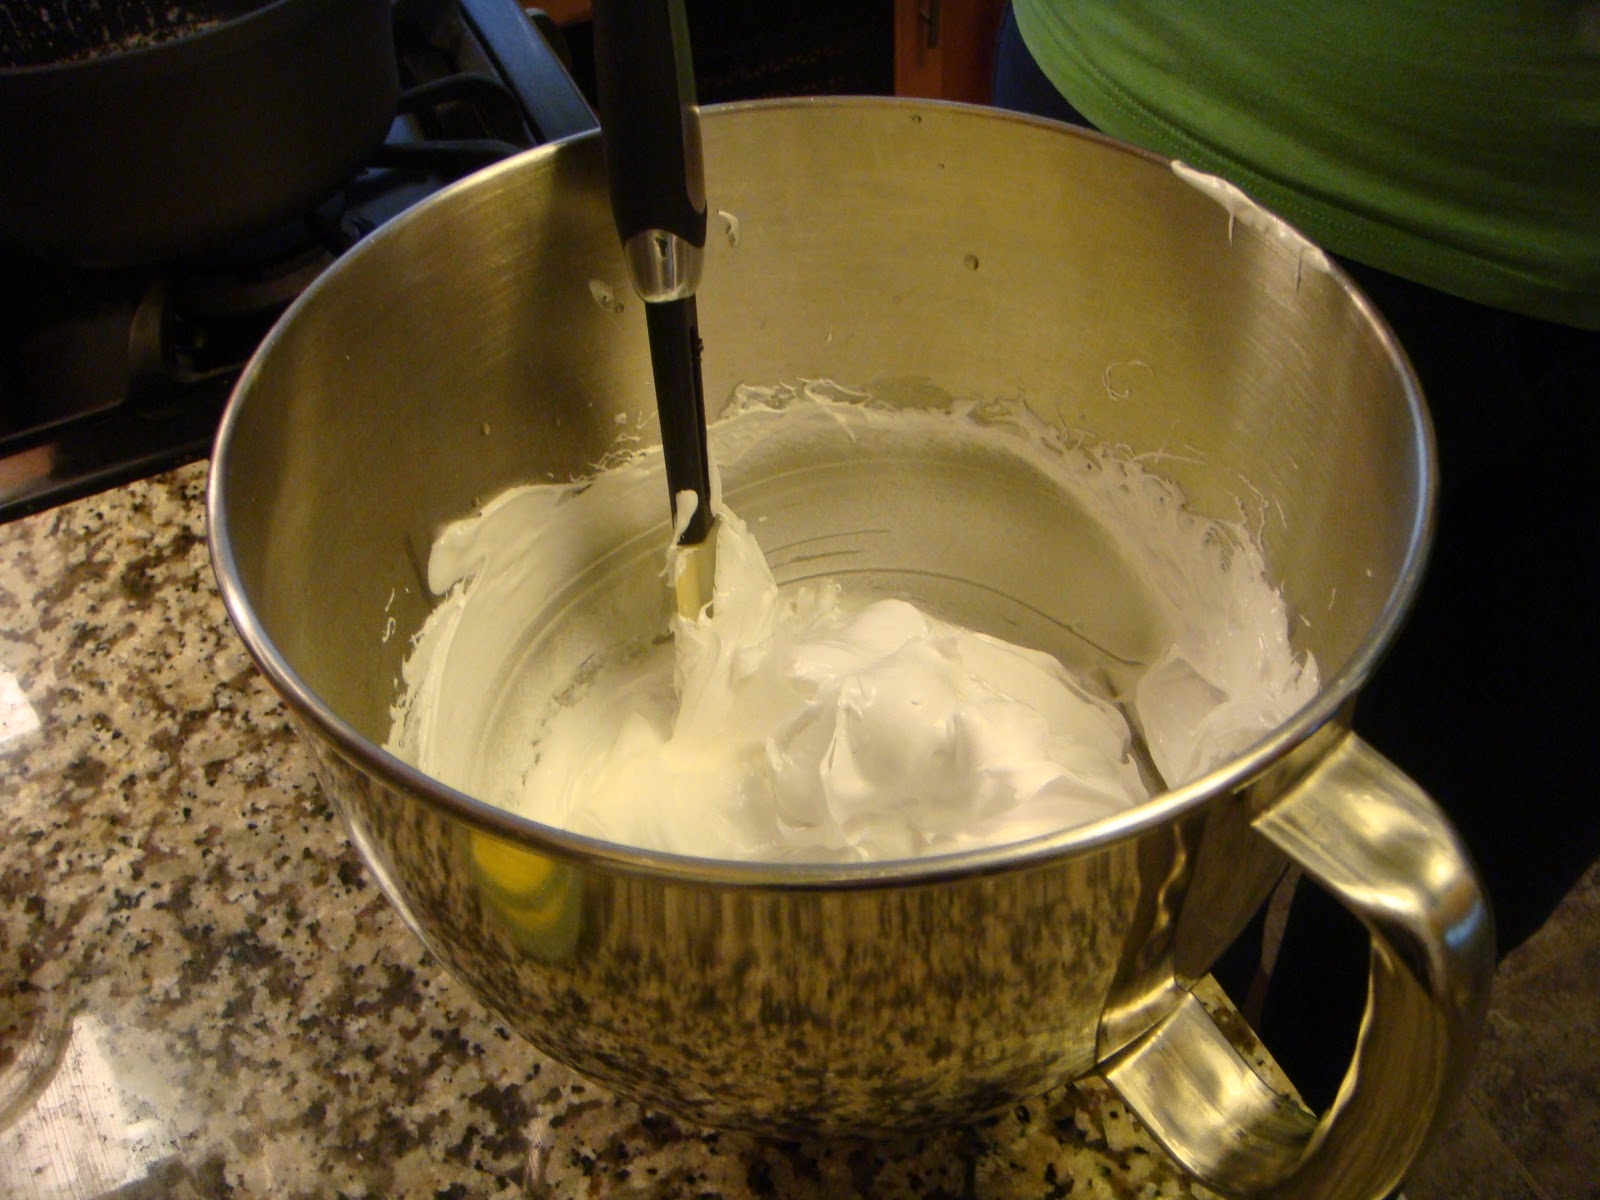
Remove syrup from heat, and pour into bowl with softened gelatin. Using the whisk attachment of an electric mixer, hand-stir the mixture, just to cool it slightly. Then attach the whisk, and beat on medium-high with the whisk attachment until soft peaks form and the marshmallow mixture holds shape, 8 to 10 minutes.


Transfer marshmallow mixture to a large pastry bag (14-inch, preferably disposable) fitted with a small tip (such as Ateco #11), and use immediately (seriously, immediately -- the marshmallow starts to firm up pretty quickly).


To pipe the Peeps: Spread a small circle of colored sugar on your work surface.


Begin by piping an oval, tapering the end and pulling upward to form the tail.


At the opposite end, pipe the head by piping a mound and pushing back toward the tail and up and then pulling away to form the beak.


Toss sugar on the chick to coat completely, and transfer to a parchment- or foil-lined sheet pan.


For a better visual, check out our video.


What is your favorite Easter candy? (Mine is definitely Cadbury Mini Eggs.)

Monday, April 18, 2011

Mini Carrot-Coconut Scones


Looking for the perfect addition to Easter brunch? Look no further! These carrot-coconut scones are light, fluffy, subtle, and citrusy. Yes, I know I just called scones, those typically hard, dry cakes, light and fluffy. I  promise you they really are -- just promise me you won't overmix the dough or overbake them.


Mini Carrot-Coconut Scones (adapted from Baked Explorations)
Printable version
Makes 16 scones

Ingredients

Scones
1 medium carrot or about 10 baby carrots
1/4 cup orange juice
2 3/4 cups flour
1/2 cup granulated sugar
1/2 cup old-fashioned oats
1 tablespoon baking powder
1/4 teaspoon salt
1 cup shredded, sweetened coconut
1/2 cup (1 stick) cold, unsalted butter, cut in 1/2-inch chunks
1 large egg
3/4 cup buttermilk
1 tablespoon vanilla extract
1 egg white, beaten

Citrus Glaze
1 tablespoon fresh lemon juice
2 tablespoons fresh orange juice
1 cup confectioners' sugar
Carrot sugar decorations (optional)

Preparation

In a small microwaveable bowl, combine the carrot(s) and orange juice.


Cover the bowl tightly with plastic wrap (I recommend Press 'n' Seal for this), and microwave for about 5 minutes. Watch carefully as the orange juice may start to boil over. When the carrot is fork-tender, it's ready. In a food processor, blend carrot and orange juice until smooth. (Mine didn't end up getting completely smooth, but I thought the orange flecks in the scones were pretty.)


Set the carrot puree aside.

Preheat oven to 400 degrees, and line two baking sheets with parchment or Silpat mats.

In a large bowl, whisk together flour, sugar, oats, baking powder, salt, and coconut. (The King Arthur Flour dough whisk is perfect for this task.)


Add the butter, and use your fingertips to rub the butter into the flour mixture until butter is pea-size and mixture is coarse.


In a medium bowl, whisk together the egg, buttermilk, vanilla, and carrot puree.

Pour the wet ingredients into the dry ingredients, and stir together with dough whisk or wooden spoon just until dough comes together.


Knead the dough just slightly, making sure the dry ingredients are mixed in.

Lightly flour your countertop, and turn the dough out onto it. Divide the dough in half, and pat each half into a round disk, about 1 inch high.


Cut each disk into eight wedges. I used a bench scraper to first score the dough and then make the cuts. You may need to flour your bench scraper or knife because the dough is sticky.


Transfer the wedges to the prepared baking sheets.


Whisk together the egg white and 1 tablespoon of water. Brush the tops of the scones with the egg white wash.

Bake scones, rotating pans from front to back and top to bottom, every 5 minutes. Bake for 15 to 18 minutes, or until a toothpick inserted in the center of a scone comes out clean. (Do not overbake them.)


Transfer the scones to wire racks to cool completely.

Once the scones are cool, place the sheet pans under the wire racks.

Make the citrus glaze: Whisk lemon juice, orange juice, and confectioners' sugar together in a small bowl.

Drizzle the glaze over the scones.


If desired, press a carrot sugar decoration onto each scone, adhering it with extra glaze if necessary.


Let the glaze set before serving the scones.


I brought these into work, and one of my coworkers came over proclaiming that he didn't like scones because they're so dry. He decided to just take a half to try, and I was not the least bit surprised when after he took one bite, he came back for the other half! He wanted to know my secret, and as I mentioned above, it's really just making sure you don't overmix your dough or overbake your scones. And they're definitely best the day you make them, although I made these the night before I brought them in, and they were still really fresh and light. Scones are truly delightful, but I'm sure many people throw them into the dislike category because they've had a bad experience with one.

Do you like scones? What's your favorite kind?