Showing posts with label lunch. Show all posts

Wednesday, February 8, 2012

Make-ahead Hash

Maybe I pushed too much for too long.  I got sick.  The kind of sick that had me doing nothing on the couch instead of doing little things around the house.  Instead of blogging I got hooked on Breaking Bad.  Oops.  Finally feeling a bit better, I wanted to share a way to get dinner on the table in 10min, with a little prep work ahead of time. #win.


Make-ahead Sweet Potato Kale Hash
Inspired by Emily and Ranjani

1 small onion, chopped
1 jalapeno, diced
2 medium sweet potatoes, cut into 1/2" cubes
1/4t smoked paprika
1t ground coriander
2-4T extra virgin olive oil
coarse sea salt
4-6c packed kale, de-ribbed and torn into pieces (~1 head)

Preheat oven to 400deg.

Add chopped onion, jalapeno and sweet potatoes to a large bowl along with spices.  Add a drizzle of olive oil and a sprinkling of coarse salt.  Toss and roast 15-20min, until the sweet potatoes are almost tender.

While the first batch of veggies are roasting, wash and de-rib the kale.  Tear into pieces and add to the bowl (same one from the sweet potatoes, no need to wash).  Add a drizzle of olive oil, sprinkling of coarse slat and a few grinds of pepper.

When the sweet potatoes are almost done, add the kale and return to the oven for 10min.

Remove from the oven and let cool before transferring to microwave-safe containers.

When it's time for dinner, start cooking your eggs.  You can poach or pan-fry your egg, whichever you prefer.  I prepared mine sunny side up in a nonstick pan.  Once you get your egg(s) cooking, warm up a portion of the hash in the microwave.  To serve, top your hash with the egg(s)!


What's been your go-to quick meal recently??

Wednesday, February 1, 2012

Butternut Black Bean Enchiladas

I had my first enchilada a little over a year ago, and it opened up a whole new world...  so many options for fillings!  This version is a spin on the Pumpkin Black Bean Enchiladas that made a few appearances in my kitchen last winter, and it's a close call as to which one I like better ;)


Butternut Squash and Black Bean Enchiladas
Serves 4

For the roasted butternut squash:
7c cubed butternut squash cubes
1t cumin
1/2t chili powder
coarse sea salt
freshly ground black pepper

For the sauce:
2c roasted butternut squash
2 1/2c water
2 lg garlic cloves
1t salt
1/4t pepper

For the black bean mixture:
1c black beans
1 chipotle, optional
1/2c greek yogurt
1t salt (use 1/2t if using canned beans)
3 chopped scallions

For the enchiladas:
black bean mixture, above
1c black beans
1c roasted butternut squash
1c chopped kale
2-3oz goat cheese
10 corn tortillas

Preheat the oven to 400deg.

Begin by roasting the squash (this can be done ahead of time).  Add butternut squash to a bowl along with a drizzle of olive oil (~1T) and spice, salt and pepper.  Toss, spread out in a single layer on a baking sheet and bake until soft and starting to caramelize around the edges, about 20min or so.

Add 2c of the roasted squash to a blender along with the rest of the ingredients for the sauce.  Blend until smooth and set aside.

To prepare the black bean mixture, add black beans through scallions to a food processor and blend until well combined.  Transfer to a bowl and combine with 1c black beans, 1c roasted squash and kale, mix well.

Spead a 9x13 pan (or two smaller square pans) with a layer of butternut squash sauce and then assemble the enchiladas.  Wrap corn tortillas in a damp paper towel and microwave fo ~1min to soften.  Mound 3-4T filling on each tortilla, roll up and place seam side down in the baking dish.  Pour butternut squash sauce over the enchiladas and crumble goat cheese over the top.  Bake at 400deg for 20-30min, until the enchiladas are warmed through and the sauce is bubbly.

Let cool a few minutes, and then serve, garnished with chopped scallions, cilantro or parsley, if desired.

For tips on freezing these enchiladas, check out this post.

Thursday, January 12, 2012

Butternut Farrotto

Farro has quickly become my favorite whole grain.  No doubt it was only a matter of time before I threw it into a risotto.  Paired with butternut squash and sage (a few more of my favorite things), this dish should be on your menu next week!


Butternut Farrotto
Recipe by Shannon
Serves 2-4

2c 1/2" peeled butternut squash cubes
2-3T extra virgin olive oil, divided
1/2c chopped onion
1 clove garlic, minced/pressed
2T chopped sage, divided
3/4c farro
1 1/4c broth (or more water)
1 1/2c water
1-2oz gruyere, finely grated

Preheat oven to 400deg.

Toss butternut squash cubes with 1-2T olive oil, some coarse sea salt and a few grinds of black pepper.  Spread out on a baking sheet and roast in preheated oven until tender, ~20-30min, stirring after 15min.

While squash is roasting, begin cooking the farro.  Heat 1T olive oil in a medium pot over medium heat.  Add onion and cook until softened but not brown, 5-8min.  Add garlic and 1T sage and cook until fragrant, 1-2min.  Add farro, stir to coat and toast the grains for a few minutes.

Add broth and water, stir and bring to a simmer.  Reduce heat to low and continue to simmer, stirring often, until the farro is tender, 20-25min.  Once the farro is tender, stir in roasted squash, remaining sage and grated gruyere.  Taste and adjust seasonings, then serve topped with crispy sage if desired.


Are you on the farro bandwagon yet?  :)

Tuesday, January 3, 2012

Sweet Potatoes & Red Lentils

Happy New Year!!

I can't quite believe it's already 2012, but hopefully you had a wonderful holiday season and are ready to get this year started right ;)  If you didn't catch my 11 Best of '11, there are some goodies in there!

While there are quite a few things I have to tell you about, I chose something a bit healthier to start off with, in case you're still in a cookie coma!  This dip morphed into a delicious soup, so you could certainly go whichever route you're craving.  Is it 50 in december?  Perhaps you'll prefer some crisp veggies and dip.  If it actually feels like winter where you are, I'd opt for a nice bowl of this delicious soup!


Sweet Potato & Red Lentil Dip
adapted from Whole Foods
Yield:  4c

1-2T extra virgin olive oil
1 sm onion, chopped
1 lg garlic clove, chopped
2 sm sweet potatoes, cut into 1/2" cubes
1" knob of ginger, grated
1t cumin
1/2t curry powder
1/2t smoked paprika
1/2t garam masala
1/4t coriander
1/2t sea salt
few grinds black pepper
1 1/2c red lentils, picked over
3/4c light coconut milk
2 1/2c water
juice of 1 sm lemon

Heat oil in a large saucepan over medium-high heat.  Add onion and saute, stirring occasionally until softened, ~5-7min.   Add sweet potatoes and spices (ginger through pepper) and saute until fragrant. Stir in lentils, water and coconut milk and bring to a boil.  Reduce heat, cover and simmer until the sweet potatoes (and lentils) are soft, ~20min.  If your liquid cooks off before the sweet potatoes are tender, add a little more  water (but not too much, or that will make for a thin dip).

Remove the pan from the heat and let cool a bit.  Add lemon juice to the mixture and puree using a blender or food processor.  Taste and adjust seasonings.

Serve with a drizzle of olive oil or chopped herbs, if you remember ;)


Sweet Potato & Red Lentil Soup

leftover sweet potato and red lentil dip (recipe above)
remaining coconut milk from the can
water/broth, if desired

Add dip and coconut milk to a saucepan and heat over medium-low heat.  Stir or whisk to combine and add any water to reach your desired consistency.  Serve warm, topped with chopped scallions or herbs, or some greek yogurt.


How did you ring in the new year?

Wednesday, November 9, 2011

Kaddo Pizza

Good Living.

My definition of good living has certainly evolved over time, but these days it often involves food.  Food so good that you  get excited just thinking about it (like these pop tarts).  Food so good want to share it with your friends and family.  If only it would last that long ;)

The idea for this pizza came together a bit serendipitously at work one day, but it immediately went on the meal plan for the weekend.  I may or may not have immediately shared my plans with one or two co-workers.  Too bad they had never had Afghani food and did not share in my excitement!

I thought back to the first time I tried Afghani food, with my friends Adeeb and Christina, at Helmand in Baltimore.  It was then that I fell for kaddo, a baked sweet pumpkin served on a yogurt mint sauce and topped with a meat sauce.  This would be the basis of my pizza.

I made some of my usual choices to keep things on the healthy side (whole wheat crust, greek yogurt, reduced sugar and good quality beef) but not at any sacrifice of flavor.  Oh the flavor...  the sweet caramelized pumpkin, spiced beef and cooling mint yogurt.  Not your traditional pizza, but delicious and one worth sharing!


Kaddo Pizza
inspired by Helmand, loosely adapted from Tiny Urban Kitchen
Yield:  2 10-12" pizzas

1lb whole wheat dough (if you like thick crusts, you'll need closer to 2lb of dough)

For the pumpkin:
1 sugar pumpkin
3T coconut oil, melted
1c evaporated cane juice (or granulated sugar)

For the sauce:
2c greek yogurt (like 2%)
2 garlic cloves, minced
2t dried mint
1/2t salt

For the meat mixture:
2T extra virgin olive oil
1 lg onion, diced
1lb grass-fed beef
1 medium tomato, seeded and diced
2 lg garlic cloves, minced
1 1/2t ground coriander
scant 1/2t sea salt
1t freshly ground pepper
1/2t ground tumeric
2T tomato paste
1/2c water

Preheat the oven to 300deg.  Halve and de-seed the pumpkin (I use a spoon to scrape out the seeds).  Peel (or cut off the skin of) the pumpkin and cut into wedges.  Place the pumpkin in a large baking pan or rimmed baking sheet.  Top with oil and sugar, then cover with foil.  Bake for 2.5hrs, then baste the pumpkin pieces with the accumulated juices.  Cover and return to the oven for another 45min or so.  Once pumpkin is nice and caramelized (deep orange in color), remove from the oven and set aside to cool.  [You can save the pumpkin sugar syrup here and use it for your morning oatmeal or latte!]

While the pumpkin is roasting, prepare the sauce and meat mixture.  For the sauce, combine all ingredients and mix well.  Cover and refrigerate until it's time to make the pizza.

For the meat sauce, begin by heating the oil in a large heavy bottomed skilled over medium high heat.  Add onions and saute until they're golden brown (5-10min).  Add the beef and continue to saute until the meat is no longer pink, breaking up the meat with a spatula or spoon to avoid large clumps.  Once the meat is browned, add the tomato, garlic and spices, then stir to combine.  Add in the tomato paste and mix well.  Add water, bring to a boil, then reduce to a simmer.  Cook until the liquid has evaporated, then set aside.

Once the pumpkin is out of the oven, turn to 400deg.  Preheat your pizza stone, if you're using one.  Dice the cooked, cooled pumpkin.  Roll out half of the dough on a surface dusted with a little cornmeal to your desired thickness (I went thin).  When it's the size of your pizza stone (or cookie sheet), remove the preheated stone from the oven, top with yogurt mint sauce, half the beef mixture, and then the roasted pumpkin.  Bake for 10-12min, until crispy.  Repeat with remaining ingredients.

Serve, with leftover yogurt mint sauce for dipping :)


I couldn't help but smile when eating this pizza, the memories of good friends, my first experience of Afghani food, and the creation of a new recipe.  Good living, indeed.

As part of the Foodbuzz Featured Publisher program, I have been entered for the chance to win a trip to Greece courtesy of FAGE.  You too can enter to win one of three trips to Greece by entering the FAGE Plain Extraordinary Greek Getaway here:  http://www.fageusa.com/community/fage-greek-getaway.

Tuesday, November 1, 2011

Pop Tarts

You never know where and when inspiration will strike.  Often it's when you least expect it.  I was eating lunch with some folks at work when the conversation somehow turned to pop tarts.  They were never my thing as a kid, and given my penchant for healthier cooking these days, I didn't give them a second thought.


That is, until I thought about my tomato jam.  I know, I know, I've already posted about it several times, but this jam uses some of summer's finest produce and a totally intriguing way.  Challenging myself to use it different ways has been part of the fun.


While I don't have a go-to healthier pie crust recipe yet, I used a cue from Winnie and used greek yogurt for some of the butter in her dough.  This seemed like a great idea and definitely helped create a healthier treat suitable for breakfast or a snack!

Enjoying food so good it makes you smile; that's good living at its finest.


Sweet & Savory Pop Tarts
crust adapted from Healthy Green Kitchen

You can certainly use whatever jam you have to fill these, and if you want to make them sweet, swap out the rosemary for 1T sugar.

2c white whole wheat flour
1/2c finely grated gruyere
1/2t sea salt
1t chopped fresh rosemary (mine was heaping)
1 stick butter, cubed
1c greek yogurt (such as Fage Total 2%)
2-4T almond milk
1 egg
tomato jam

Add flour to a large bowl along with gryere, salt and rosemary, then stir to combine.  Add butter and yogurt, and cut in using a pastry blender or a couple knives.  The dough should resemble some large pebbles at this point.  Stir in milk, 1T at a time, until the dough just comes together.  Divide dough in half, flatten into a loose rectangle, wrap in saran wrap and then refrigerate for several hours or overnight (I only waited an hour and it was fine).

Take your dough out of the fridge and let it soften a bit for ~15min.  Place one half on a lightly floured surface and roll it into a rectangle at least 9"x12" in size (I used a ruler).  Repeat with the second half of dough.  Cut each 9"x12" rectangle into nine smaller 3"x4" rectangles.  Set the trimmings aside.

Beat the egg in a small bowl to use as an egg wash.  Brush over the surface of the first dough (9 rectangles), this will be the inside of the pop tart and help hold the top on.  Add a heaping tablespoon to the center of each rectangle (Deb advises leaving at least 1/2" perimeter of bare dough around the filling).  Place a small rectangle from the second dough (not egg washed) on top of the filling.  Press around the filling with your fingertips to seal the dough on all sides, and then press with the tines of a fork.  Prick the top of each tart multiple times with a fork (for the steam to escape).  Repeat with remaining rectangles.

Carefully add the tarts to a parchment-lined cookie sheet.  Top with grated cheese or egg wash and coarse sea salt.

Here's where I goofed.  I accidentally skipped the 30min refrigeration and found they baked better at 400deg for 18-20min, until lightly golden brown.    However, original instructions called for refrigerating them for 30min while you preheat the oven to 350deg.  Then they're baked for 20-25min.  I'd say you could do either option.

Let the pop tarts cool on the cookie sheet on a cooling rack.

These are best not too long after coming out of the oven (just don't burn your tongue!), although they will be ok for a day or two at RT.  Pop the tarts (haha) in the toaster to reheat them a bit before enjoying!


As part of the Foodbuzz Featured Publisher program, I have been entered for the chance to win a trip to Greece courtesy of FAGE.  You too can enter to win one of three trips to Greece by entering the FAGE Plain Extraordinary Greek Getaway here:  http://www.fageusa.com/community/fage-greek-getaway.
Tuesday, October 18, 2011

Spinach Basil Pesto

Just when I thought summer produce was pretty much done, I came home with a bag full of basil, spinach, eggplant and a tomato from my CSA!  To celebrate I whipped up a batch of spinach basil pesto.


Short on nuts, I used some ground almonds, but you should feel free to use whatever you have on hand (pinenuts, walnuts, hazelnuts...).  While it would have gone well with pasta, my spinach basil pesto found different fates.  Quite a few grilled cheeses were made with pesto and tomato jam- a heavenly combination if you ask me :)

Grilled cheese with spinach basil pesto and tomato jam, roasted green beans on the side

Another tasty use was in a side dish of some roasted eggplant and fresh tomato slices.  Layered with spinach basil pesto and topped with some Parmesan, an elegant side dish was thrown together easily!  Layer in some mozzarella, and you've got a more substantial appetizer/side.


Spinach Basil Pesto
Recipe by Shannon
Yield ~1c

1c packed basil
2c packed baby spinach
1-2 garlic cloves
juice of 1 lemon
2-3T almond meal
extra virgin olive oil
salt and freshly ground pepper, to taste

Add all ingredients (basil through almond meal) to a blender or food processor and with the motor running, drizzle in olive oil until it's well combined  (you'll probably use 1/4-1/2c).  Scrape down the sides as needed, and season to taste with salt and pepper.


What's your favorite use for pesto??

Friday, September 30, 2011

Tomato Jam

I don't think it's too late for this tomato recipe...  at least I hope not!  Quick, go buy some tomatoes and then come back :)


A bunch of field tomatoes from my CSA were sitting on my counter, giving me the evil eye for not using them.  I had to do something, and quick!  Dawn's Tomato Pie was almost the winner until the thought of a tomato jam couldn't get out of my head.

whole grain pita bites topped with goat cheese and tomato jam

It took awhile to cook the juicy red fruits down, but oh it was worth it!!  I fell in love immediately with this sweet and spicy jam and immediately started brainstorming things to do with it.

scrambled eggs with corn and tomato jam

Scrambled eggs with corn and tomato jam
Cheese and crackers with tomato jam
On sweet corn poundcake
On a sandwich...  egg and cheese or grilled cheese anyone?
And a few other things that you'll see soon ;)

sweet corn poundcake with tomato jam

Tomato Jam
adapted from the NY Times and food52
Yield:  ~2c

You can probably use whatever kind of tomatoes you have on hand or can find at the farmers market.  I just used field tomatoes - which are pretty juicy and took awhile to cook down.

3 to 3 1/2lb tomatoes, cored and chopped
1sm onion, diced (~1/2c)
zest & juice of 1 lemon
1/2c brown sugar
1 1/2c evaporated cane juice (or granulated sugar)
1/4c cider vinegar
1/2t cinnamon
2t salt
1t cumin
1/2t coriander
1/8t cloves
red pepper flakes or cayenne, to taste

Combine all ingredients in a heavy sauce pan or stock pot.  Heat over medium heat and bring to a boil, stirring often.  Reduce heat and simmer, stirring occasionally, until the mixture has thickened and reached a jam-like consistency, 2-3hrs.

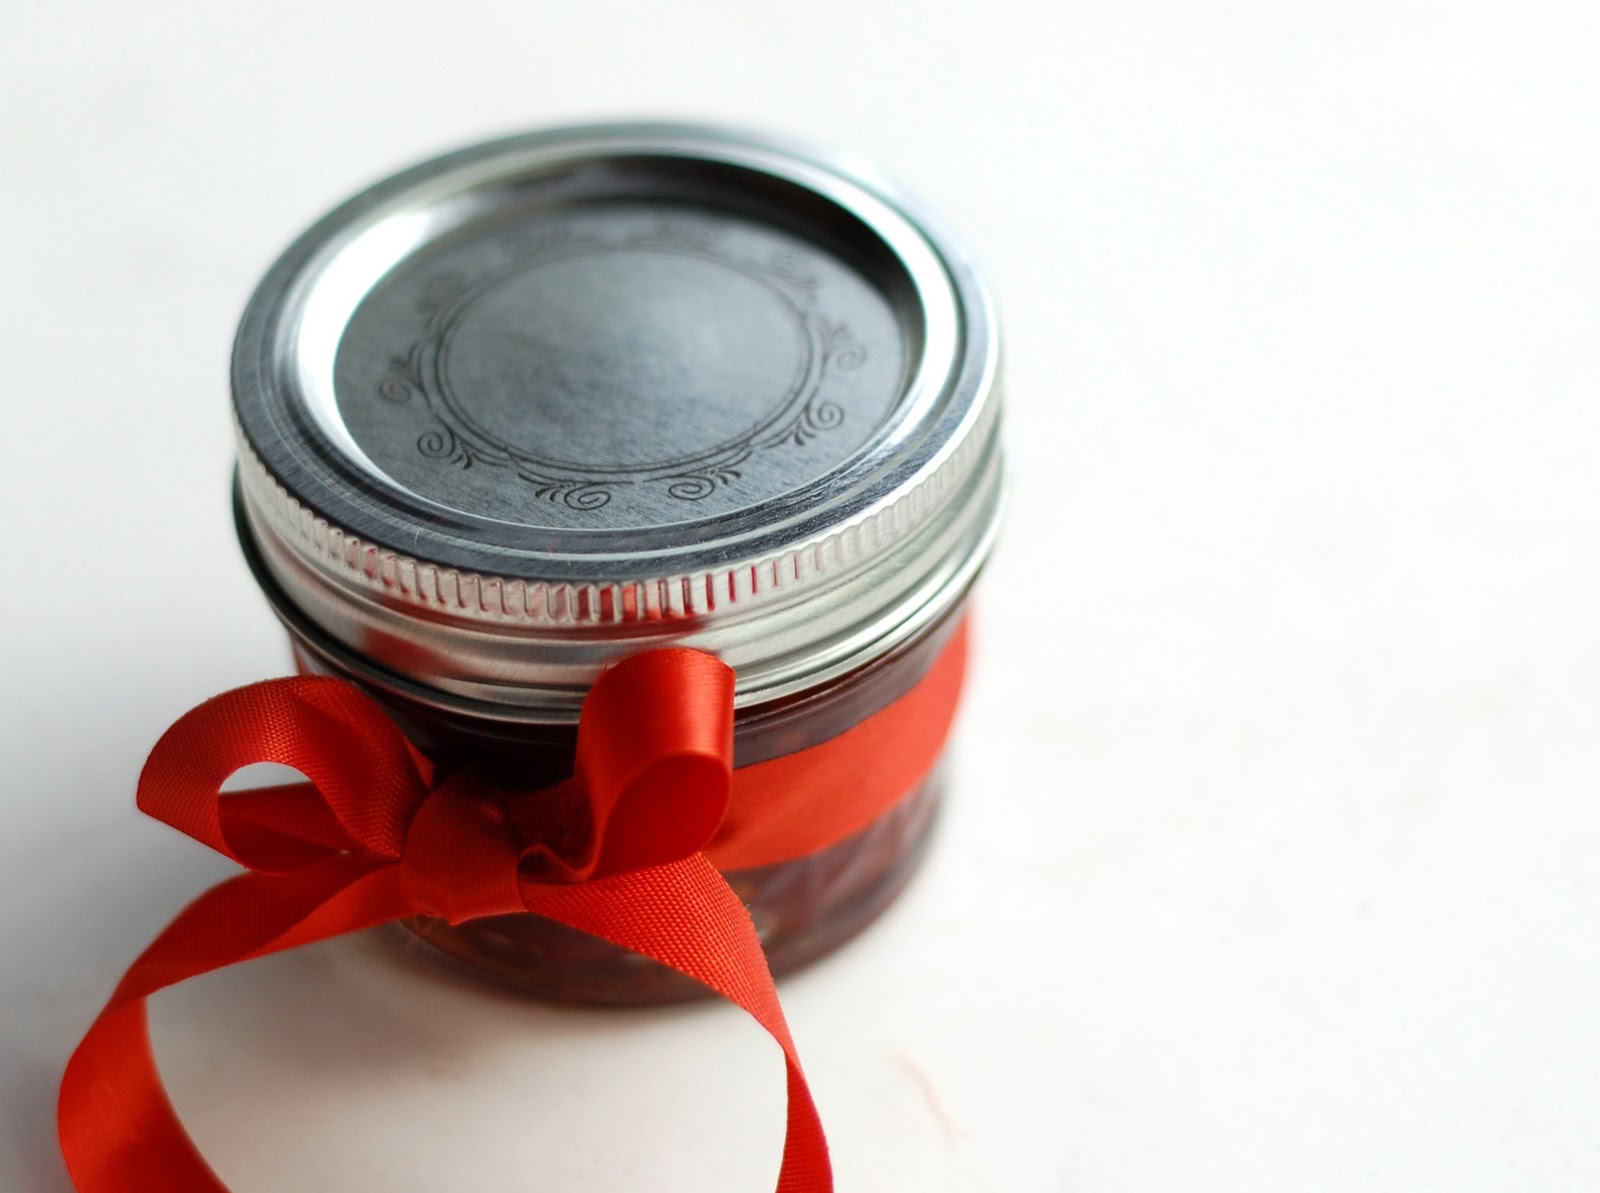
Transfer to sterilized glass jars and cool.  Can be stored in the refrigerator 1-2 weeks or use a hot-water canning bath for 15min for long-term storage.


What would you put this tomato jam on??

Thursday, September 22, 2011

Cleaning out the Pantry

I've been trying to get better about using the ingredients in my pantry.  I really have.  When I rummaged through them the other day I came across some refried black beans and garlic salsa that I pulled out and set on my counter to use.  A few days later I used them, along with some sauteed onions, zucchini and summer squash from my CSA to make delicious tacos for dinner!


Made even better by homemade spelt tortillas!  (Spelt flour being another thing I was apparently hoarding for a rainy day).   A fun project, these were soft and tasty, albeit a little tough to work with in my warm, humid apartment.  Some (ok, a lot of) extra flour and a little perseverance was all that was needed ;) 


I also uncovered a little bit of Israeli couscous from who knows when ;)  Really, I don't want to know.  When an eggplant arrived in my CSA I knew just what to make!


Don't let my sub-par photo deter you (I was exhausted and couldn't bring myself to get out my light box), the warm spices and creamy roasted eggplant totally won me over.  

Israeli Couscous w/Roasted Eggplant
slightly adapted from bon appetit
serves 2

This could be served as a side, or bulked up with some greens and chickpeas to serve as a vegetarian main dish.  Feel free to toast your own cumin seeds and grind them fresh as the original recipe suggests.  I was short on time, so opted to take the easy way out.

1- 1lb eggplant, cut into 1/2" cubes
1/2c israeli couscous
2-3T extra virgin olive oil, divided
1T white balsamic vinegar
1t ground cumin
3/8t ground cinnamon
2T finely chopped shallot
2T golden raisins
4 cubes of fresh frozen cilantro (found at Trader Joe's, could also use 1-2T fresh chopped)

Preheat oven to 450deg.

In a bowl or on a baking sheet, add 1 1/2T olive oil, salt and pepper to the eggplant.  Toss to coat and then roast until tender and golden, 20-40min.  (Mine were done rather quickly, they may have been on the smaller side)

Meanwhile bring a small pot of water to a boil.  Cook Israeli couscous in salted, boiling water until just tender, a little over 5min.  Drain and then rinse with cold water.

After the couscous and eggplant are cooked, prepare the dressing.  In a medium bowl, add vinegar, 1-2T olive oil, cinnamon and cumin.  Whisk well, then add in onion and season with salt and pepper.  Once cooled to RT, add couscous, eggplant, raisins and cilantro.  Fold together, taste and adjust seasonings.


CSA items used:  4
Pantry items used: 6

I might have a ways to go, but I'm making progress!!

Do you have a tendency to stock up on ingredients you use normally or have a small pantry and have to pick up everything you need each week?

Tuesday, September 20, 2011

Farro w/Roasted Tomatoes & Eggplant

This recipe was born from the bounty of a friend's garden.  Slowly roasted tomatoes as sweet as candy (reminding of the tomato tarte tatin from last year!).  Chewy farro.  Soft roasted eggplant.  Aromatic roasted garlic.  The success, I think, is in its simplicity.


Farro w/Roasted Tomatoes & Eggplants
Recipe by Shannon
Serves 4

I served this along some fish (not worth repeating), but it would also pair well with roasted garlic sausage, tofu or your favorite protein.

1c farro
2lb grape tomatoes
1 lg eggplant, diced
4-5 cloves of garlic
extra virgin olive oil
salt and freshly ground pepper

Preheat oven to 250deg (or 300deg if you're a little short on time).

Add tomatoes to one baking sheet and eggplant to another.  Drizzle both with olive oil, sprinkle with salt and pepper, and toss to coat.  Wrap garlic cloves in foil and place on one of the pans.

Bake, stirring every 15min or so, until the tomatoes have begun to burst and release their juices and eggplant is soft and browned.

Meanwhile, bring a medium pot of water to a boil.  Add a bit of salt and farro.  Cook until tender, 15-25min.  Drain and add to a large bowl.  Add roasted eggplant and tomatoes.  Squeeze roasted garlic out of the cloves.  Mix well, then taste and adjust seasonings before serving.


Are you a fan of farro?   Or perhaps you prefer quinoa, wheat berries or another grain?

Thursday, September 8, 2011

Stuffed Peppers (CSA Week 11)


The purple peppers in this week's CSA screamed to be used for something special.  I almost went with Joanne and Meghan's suggestion for a curry before it dawned on me-- I should make stuffed peppers!  Even better, I could use some other items from my CSA and pantry, a win-win given my impending move.


Stuffed Peppers
Yield:  4-5 stuffed peppers

4-5 peppers (the bigger the better)
1 small onion, diced
1 zucchini, diced
1 summer squash, diced
1-2T extra virgin olive oil
~1/2c frozen chopped spinach, thawed and well drained
~1/2c frozen corn, thawed
1 package of sprouted brown rice (or 1c of your favorite grain)
1 can chickpeas, drained and rinsed
1 can diced tomatoes (mine were roasted w/chipotle)
seasonings (ex:  s/p, cumin, oregano, hot sauce...)
1/2c grated cheddar (or more, I used grass-fed New Zealand cheddar)

Preheat oven to 400deg.

Heat oil in a nonstick pan over medium heat.  Add onion, and cook 3-4min, until translucent. Add zucchini and summer squash, stir and cook until soft and starting to brown.  Remove from heat and let cool a few minutes.

Wash your peppers and cut them in half.  Remove stem, ribs and seeds and set in a square pan with sides so they don't roll around.

In a large bowl, add spinach, corn, rice, chickpeas, diced tomatoes and cooled veggies.  Mix well, taste and add seasonings.  I went with a little salt, freshly ground pepper, and a few shakes of ground cumin.  Stir again and then stuff your pepper halves.  Top each pepper with ~2T grated cheese.

Bake for 20-25min, until cheese is melted and peppers cooked through (you can test them with a knife).


CSA items used: 3 (peppers, summer squash, zucchini)
Pantry items used: 5 (corn, spinach, brown rice, chickpeas, diced tomatoes)

Pantry items left:  let's not discuss that...

Thursday, August 25, 2011

Tomato Corn Pie (CSA Week 10)


With the appearance of native beefsteak tomatoes and corn in my CSA, I knew exactly what was going to be on my menu this week...  tomato corn pie!


This recipe has been on my radar for awhile, and I'm glad I finally got around to making it.  Frankly I don't know what took me so long ;)  Combining two of summer's best with a biscuit crust, this is certainly a winner.  


Tomato Corn Pie
adpated from Gourmet
Serves 4-6

The lemon "mayo" (I swapped greek yogurt for most of the mayo) was a delightful surprise, although I'm going to suggest you put it in between layers instead of on top of all of the tomato and corn.  Even after draining the tomato slices a bit my pie was still juicy when I cut into it, just pour off the liquid if this happens to you.

For the biscuit crust:
2c white whole wheat flour
1T baking powder
3/4t salt
6T cold unsalted butter, cut into 1/2" cubes
1/4c greek yogurt whisked with 1/2c milk (or 3/4c buttermilk)

For the filling:
1/3c greek yogurt
2T olive oil mayo
zest and juice of 1/2 lemon (could double this if you have it)
1 3/4lb beefsteak tomatoes, peeled* and sliced crosswise 1/4" thick and drained on paper towels
corn kernals from 3 ears (~1 1/2c)
3 scallions, sliced (~1/2c)
2-3T thinly sliced basil
salt & freshly grated black pepper
5oz grated sharp cheddar cheese

Preheat the oven to 400deg.

In a large bowl, whisk together dry ingredients for the crust (flour through salt).  Cut in butter with a pastry blender (or your fingers), until the mixture resembles a coarse meal.  Add milk, stirring just until a dough forms.  Gather into a ball and divide dough in half.

Roll out each half of the dough between 2 sheets of parchment paper to a size that's bigger than your pie plate.  With one circle, remove one sheet of parchment, invert into pie plate.  Use your fingers to pat the crust into the plate and discard the other sheet of parchment paper.

In a small bowl, whisk together greek yogurt, lemon zest and juice, and mayo.

Arrange half of the tomatoes on the bottom of the pie crust.  Top with half the corn, scallions and basil.  Sprinkle with salt and freshly ground pepper.  Pour lemon-yogurt mixture over the filling and top with half the cheese.  Repeat layering with the rest of the ingredients.

Place the other half of the dough on top of the pie and then pinch the edges together with the bottom crust to seal.  Cut 4 vents in the top crust to allow steam to escape.  You can brush the top with melted butter, milk or an egg wash...  but I chose not to.

Bake for 30-35min, until crust is golden and filling is bubbling.  Cool on a wire rack.  Serve warm or at room temperature.

*To peel the tomatoes, slice a shallow X on the bottom and drop in boiling water for 10sec.  Plunge into ice cold water to cool, then drain and the peel should easily slip off!


Hang onto summer and go make this pie!!

Monday, August 22, 2011

Corn & Caramelized Onion Salad

Cake, cake and pie, oh my!  Time's been short, and those recipes were just easier to type up :)  Anyways...  this recipe was a surprise hit at a BBQ I went to recently, so I figured you'd want to know about it!  I saw it on food52 earlier in the week and instantly knew what dish I'd be bringing.


Corn & Caramelized Onion Salad
adapted slightly from food52
serves a crowd

I used a mix of cooked and fresh corn kernals here because I didn't have enough corn the night I was preparing this, but liked the combination.  Feel free to use one or the other entirely!

7 ears of corn, divided
1 large red onion, peeled and diced
1-2T extra virgin olive oil
2T balsamic vinegar
scant 2t evaporated cane juice (or granulated sugar)
2oz diced pancetta (I bought mine pre-diced at trader joe's)
3-4T chopped cilantro (I used ~3T fresh frozen cilantro

Bring a large pot of water to a boil.  Cook 4 ears of corn in boiling water for 3-4min, then plunge into an ice water bath to cool.  Drain and then cut off kernals from both the cooked and raw corn cobs into a large bowl.

Heat olive oil in a heavy skillet over medium heat.  Add diced onions, balsamic, sugar and a dash of salt, stir to coat the onions.  Cook for 2-3min, stirring occasionally, and then reduce heat to medium low.  Cook for 20-25min, until the onions are nice and caramelized.  Remove from pan and set aside to cool.

Add pancetta to the pan and cook on medium heat until brown and crispy.  Drain pancetta on paper towel-lined plates.

Add caramelized onions, pancetta and cilantro to the corn.  Mix well, taste and adjust seasoning with salt and pepper.  Garnish with cilantro or parsley, if desired.


What was the last dish you made that was a surprising hit?

Tuesday, August 16, 2011

Salads & Cake (CSA Week 9)


Week 9 goods

Weeks are disappearing before I have a chance to catch up...  I really don't know how we're already halfway through August?!  Thank you all for the birthday wishes!

This week I've got a couple salads that I've had the please of enjoying recently.  No real recipes, just some fresh pictures and ingredients :)


Aurgula
Green beans, blanched
Fresh corn kernals, raw
Yogurt-marinated chicken, diced
Croutons, made from cubed wheat baguette, rubbed with olive oil and garlic
Leftover dressing


Baby spinach
Fresh corn kernals, raw
Cherry tomatoes, halved
Feta, crumbled


To balance out the carrots, how about some cake?  (I know, you just had pie)  This one is totally worth it, too, everyone at work was a fan-- especially my birthday buddy :)  Unfortunately I didn't get good pictures...  check out Jen's!!


Please excuse the mess and out-of-focus picture, it ended up looking great!!


Carrot Cake Cheesecake Cake
slightly adapted from Jen

I followed her instructions, but used slightly different recipes, which I'll note below.  The cake was nicely spiced and not too sweet.  The cheesecake, well,

Carrot Cake Layers
adaptations to the CI recipe:

Mix of all purpose and white whole wheat flour
Reduced sugar to 7oz
Reduced oil to 3/4c
Added 3/4c applesauce

Cheesecake
adapted from Louis

2 pkg reduced-fat cream cheese, RT
1c evaporated cane juice (or granulated sugar)
3 eggs, RT
8oz greek yogurt, RT
1t vanilla extract

Preheat oven to 330deg.
Cream together cream cheese and sugar.  Add eggs and beat until incorporated.  Add greek yogurt and vanilla and mix until well combined.  Pour mixture into a springform pan, give the pan a tap to unsettle any bubbles.

Bake at 330deg for 30min, then lower temperature to 300deg for 15min.  Turn off the oven and leave cheesecake in oven for 1hr.  Then remove and let cool.

Cream Cheese Frosting
Recipe by Shannon

8oz reduced fat cream cheese, RT
4T butter, RT
1 3/4c powdered sugar, sifted
1t vanilla extract

Add cream cheese to the bowl of a stand mixer and beat until light and fluffy, a few minutes.  Add butter and continue mixing until well combined.  Gradually add in powdered sugar until frosting has reached your desired consistency (might be more or less than what I used depending on temperature/humidity/personal preference).  Add in vanilla, mix well and then refrigerate for a bit before frosting the cake.

Wednesday, August 10, 2011

Massaged Kale & Corn Salad (CSA Week 8)

My first blueberries from Marshalls Fenway Farm CSA didn't last long-- a day, tops ;)  Luckily I was able to make the other ingredients last a bit longer to pull together a dinner or two!


That sweet onion hanging out in near the blueberries got grilled up to top some simply seasoned grass-fed beef burgers.

Courtesy of my droid

The corn got shucked and added (raw) to some massaged kale (1 large head of kale, 1/2-1 avocado, juice of 1 lemon, coarse sea salt) and halved cherry tomatoes.  Absolutely delicious.


Ah, summer.   Please don't go.


What is your favorite thing to grill?  Mine is probably onions...  although I'll never complain about anything off the grill ;)

Thursday, July 21, 2011

Vegetable Crazy

The thing about having a CSA is that you get a lot of veggies.  Every week.  And while I like to come up with creative things to do or try out recipes that have been on my list for awhile, sometimes time and motivation are lacking.


Enter:  the stir fry.  Or is it just simply sauteed vegetables?  I don't know the difference.  Coming back from a weekend out of town I had 3 peppers, onions, corn,  CSA zucchini and swiss chard.  After chopping everything up, dinner came together in a snap.  Heat up some oil in a large pan/wok, add veggies based on their cooking time (peppers and onions first, then zucchini, then swiss chard, garlic and corn), some herbs/seasonings (this time there was white pepper, thyme, and fresh basil), and cannellini beans for some staying power and dinner's on the table! Delicious, full of flavor, and even pretty to look at ;)


Another one of my favorite things to do with vegetables is to roast them.  (No surprise there!)  This time I roasted carrots, zucchini and summer squash from my CSA with onions, eggplant, and green pepper.  While those were in the oven I cooked up some wheat berries.  When the veggies and wheat berries were done, I tossed those with some pecorino toscano and enjoyed it for lunch!


The bottom line is that you can use whatever you hand in order to create a delicious, nutritious meal!  Any myriad of vegetables will work in either preparation, can be combined with your favorite grain, vary up the protein you use, and try different cheeses!   The possibilities are endless :)

Monday, July 18, 2011

Potato Green Bean Salad (CSA Week 5)


Another week and what, are those peas?!?  And green beans!?!  (And carrots and spinach and chard oh my).  Week 5 of Marshalls Fenway Farm CSA certainly did not disappoint!

All the spinach I've been getting (and the humidity) has driven quite the smoothie kick, so you won't likely see it in any recipes soon.  If you haven't tried it yet, you must.  Start with a small handful in your favorite blend and you won't taste it, promise (right Kerstin?)!  This one contained almond milk, protein powder, cucumber (peeled), spinach, 1/2 frozen banana and some strawberries if I remember correctly.  Delish :)


Green Smoothie, glass from Lancaster Brewing Co


I've never been a fan of potato salad, in fact I've probably mentioned it before.  But when Rebecca made Deb's Potato Arugula Salad over the 4th of July, it was a big hit.  Filled with lots of green veggies and tossed with a light dressing, this was anything but your traditional potato salad.


purple potatoes make me smile :)

When I saw the green beans and peas in my CSA, the salad came immediately into mind, except with a few different twists.  More vegetables came to the party, and a little protein was added to make it more of a meal.  This is a perfect light lunch or dinner for the summer, perhaps bring it to the beach or park for a picnic!  It was also delicious over the course of the next few days, so don't hesitate to make it ahead of time.


Potato Green Bean Salad
adapted from Smitten Kitchen
Serves 4 (as a main dish salad)

1lb fresh peas, shelled (~1c peas, could also use frozen)
1lb green beans, trimmed and cut into ~1" pieces
1 1/2lbs fingerling potatoes, sliced into ~1/2" rounds
1lb chicken breasts, poached  and cut into bite-size pieces (tofu would work well here too)
5oz arugula
2oz walnuts, lightly toasted
kosher salt and freshly ground pepper
3T mild vinegar (I used champagne vinegar)
3T greek yogurt
1 1/2t dijon mustard
3/4t coarse salt
3T extra virgin olive oil

Bring a large pot of water to a boil.  While that's heating up, prepare an ice bath in a large bowl.  Add a pinch of salt and the green beans to the boiling water.  Cook for 2-3min, then add the shelled peas and cook another minute more.  Using a slotted spoon, transfer the beans and peas to the ice bath.

Add potatoes to the boiling water and cook for ~10min, until the rounds are fork tender and not falling apart.  Pour potatoes into a colander to drain, as well as the beans and peas.  Set aside.

In a very large bowl (or better yet, split it into two bowls so you don't spill everything onto your counter), add arugula, potatoes, beans, peas and chicken.  Season with 1/2t salt and 1/4t pepper and toss to combine.

For the dressing, whisk together vinegar, yogurt, dijon and salt.  Continue whisking as you add the oil, then drizzle over salad.  Toss salad again and serve!  Or transfer to containers to store in the fridge until you're leaving for the beach/park/work :)


Do you have a go-to summer salad? 

Friday, July 15, 2011

Squash & Potato Gratin (CSA Week 4)

Let's pretend that I'm on top of things and these were the veggies I got from Marshall's Fenway Farm CSA last week, k?  ;)    


And while we're at it, let's pretend that you see summer squash in the above photo, because the recipe I'm sharing today is one for a summer squash and potato gratin.  It was CSA squash that I used, so I'm calling it good :)

This recipe is so simple, I didn't expect much of it.  But perhaps that is why it tasted so amazing.  I'm certainly glad I didn't pass it over, and I urge you not too, either.  Especially if you're starting to get a bounty of summer squash right now!!  It's a perfect summer side dish, and even reheats well!


Summer Squash & Potato Gratin
slightly adapted from The Kitch'n

2 med summer squash
3-4 sm-med red potatoes
1/2 onion
1 lg garlic clove, minced
3T olive oil (I eye-balled this amount)
4oz goat cheese
kosher salt
freshly ground pepper
1/4c milk (I used almond milk)
1/3c freshly grated Parmesan
fresh basil

Preheat oven to 400deg.

Thinly slice the summer squash, potatoes and onion using a mandoline or chef's knife.  You're aiming for ~1/8" or less.  Add these vegetables to a large bowl with the minced garlic.  Toss with olive oil.

Spray an 8" square baking dish with nonstick spray.  Spread ~1/3 of the vegetables in the baking dish, then season with salt and pepper.  Crumble half the goat cheese over the vegetables.  Repeat with 1/3 of the vegetables, seasoning and goat cheese.  Top off with the last of the vegetables and season with salt and pepper.

Pour milk over the dish and then top with parmesan.  Cover with foil and bake for 30min.  Uncover, than bake 15-20min more, until the top browns.  Sprinkle with thinly sliced basil before serving (use as much or as little as you'd like, we definitely preferred more than the 1T suggested!).


If you're looking for other summer squash recipes, here are some that I remember fondly :)

Summer Squash & Basil Cornbread
Summer Squash Soup
Sauteed Squash
Summer Squash Cupcakes
Summer Squash & Onions in Brown Sugar (I never posted this, but it was delicious!)


Any other ideas for delicious summer squash??