Sunday, April 4, 2010

Chicken Chimichangas

The warm weather on Thursday had me craving an ice cold Corona with lime and/or a margarita on the rocks with salt. Both were satisfied come Friday night, beginning with a margarita or two and ending with multiple Coronas I whipped up a quick and easy marg with Jose Cuervo mix. We were having company for dinner and I decided to cook Mexican food again to pair with my drink cravings. I prepared an appetizer spread consisting of homemade guacamole, a store bought salsa and two types of Tostitos tortilla chips- Scoops and Lime!
The jarred Santa Barbara brand salsa that I picked out on a whim ended up being a big hit with plentiful chunks of roasted red pepper, black beans and corn. For the batch of homemade guacamole, I scored two perfectly ripe avocados. This is the first key step to a good bowl of guac, no doubt.
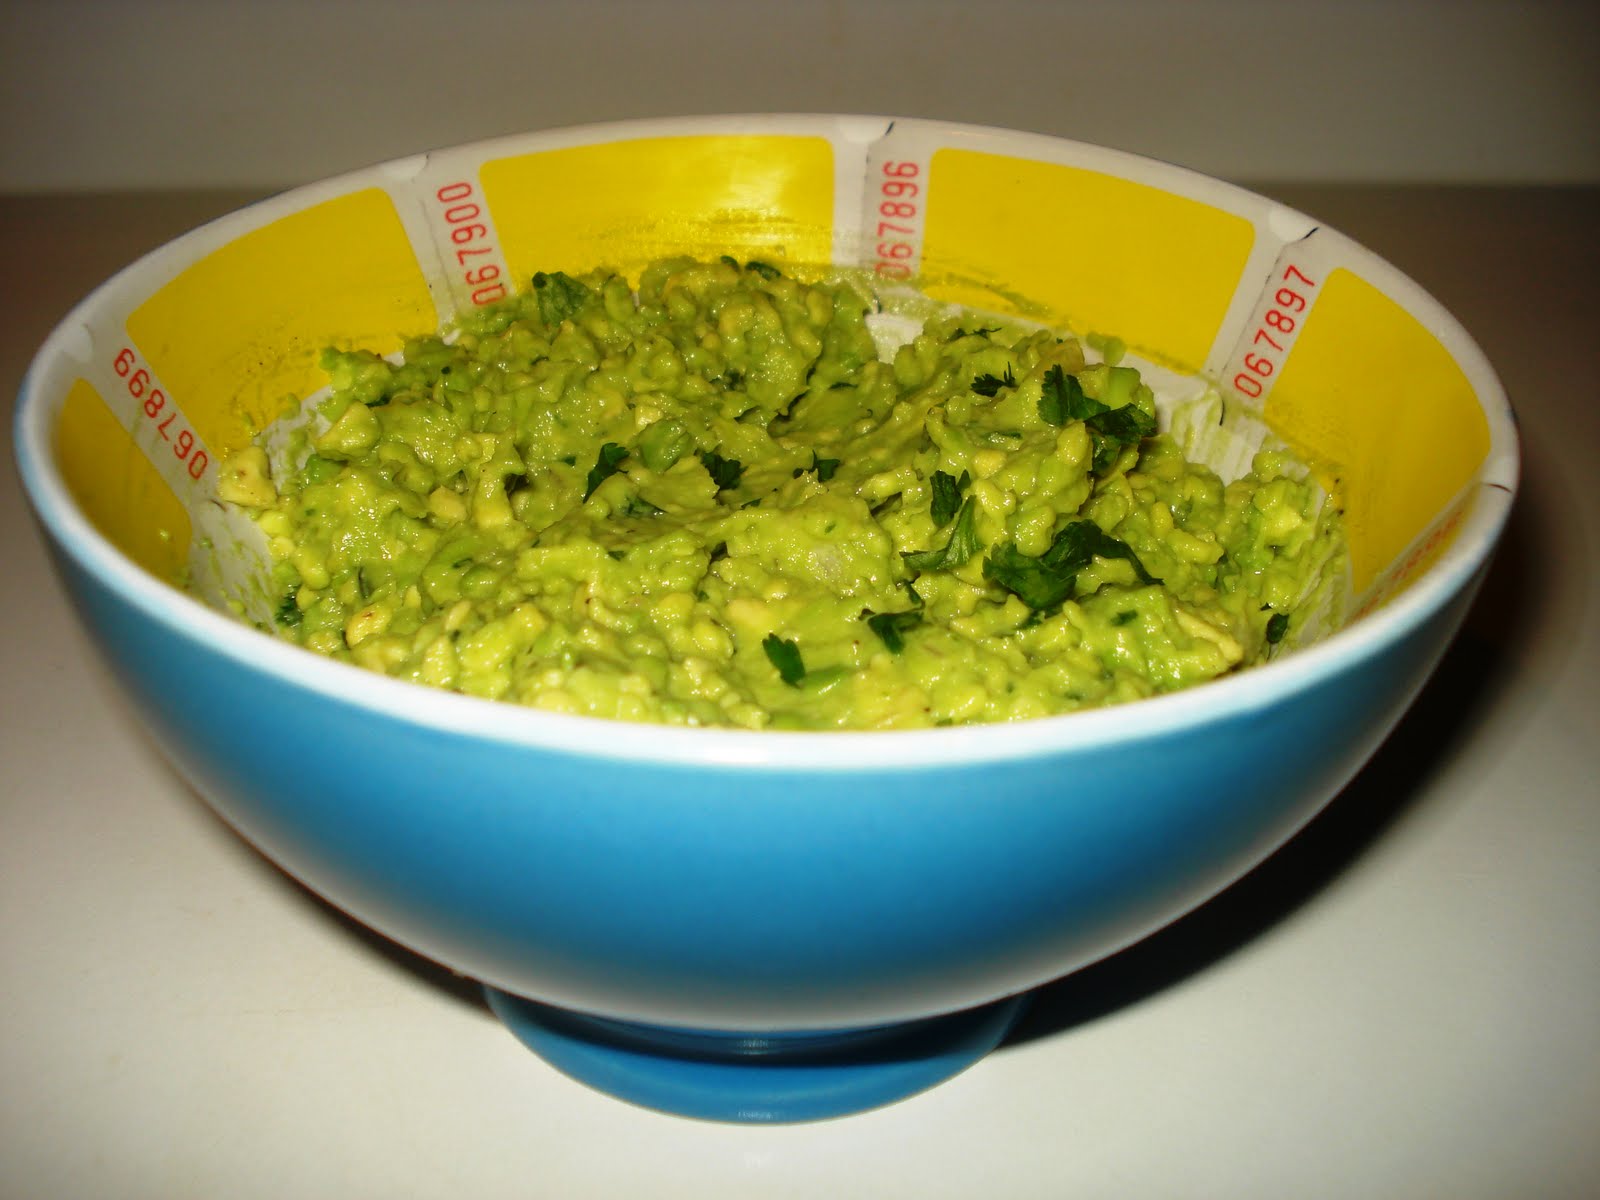
Daisy's Guacamole
-2 ripe avocados, skinned, pitted, diced and finely mashed.
-2 limes, juiced
-2 tablespoons fresh cilantro, diced
-2 gloved of garlic, minced
-salt and pepper to taste

It's a fairly straightforward recipe, the general rule of thumb is one avocado to every one ingredient! Simply combine all ingredients and serve immediately.
The avocados produced a lovely bright green dip speckled with dark green cilantro, definitely deserving of a photo shoot!
Nothing hits the spot like creamy, buttery guacamole laced with fragrant cilantro, refreshing bursts of lime and contrasting hints of garlic.
For dinner I made Roast Chicken Chimichangas. Instead of detailing out the recipe since it isn't my own, just click on the link provided above!
In the mix we have pre cooked and shredded chicken, diced green chiles, diced scallions, garlic, cheddar cheese and cumin.
I had made these once before so I knew they were easily prepared and served a large quantity. I made us two each, though most of us were full after one! Nothing wrong with leftovers!
I served Near East Spanish rice on the side, which I forgot to take a picture of. Both the guacamole and the chimis called for garlic, so the highlight of the meal preparation was getting to try out my new garlic grater plate purchased last Sunday at the Boston Flower & Garden Show. Proudly presenting: The Gourmet Grater.
Our grater is Handmade, hand painted, and triple glazed in Spain. It is made out of the finest white clay. Each plate is slightly different so no two are exactly the same.
First, you place a single clove in the peeler, press and roll. Then you move the garlic in any direction over the serrated ceramic and voila, the garlic is grated in seconds flat. Then you brush the garlic paste into your dish. It's super easy and I can't wait to try it out with other ingredients. The Gourmet Grater is dishwasher safe too.
After dinner, we all switched to sipping Coronas which were generously provided by our guests.
We were one beer short of polishing off the 12 pack.
Cheers to a fun evening spent eating and drinking with friends!

Turkey and Spinach Lasagna

I have a confession to make.  I've never made a lasagna before.  I've certainly helped my mother make lasagnas before but I've never made one on my own.  This is probably for several reasons.  While I love lasagna, it is not at the top of my list of pasta dishes that I crave.  Plus, I've lived on my own for so many years and even living with my boyfriend now, a lasagna is just way too much food.  But I'm learning to be better about freezing meals, especially since I've started using a slow cooker this past year.  So I decided to make a healthy turkey and spinach lasagna dish for dinner on Friday night.  Plus, my friend KK was coming over for dinner and I needed to make something soft for dinner since she had just gotten her wisdom teeth out earlier in the week and was still recovering.

After putting in a few unavoidable hours in the office, I headed over to Whole Foods to pick up some ingredients.  I had so many fresh and packaged ingredients that I had to split them into two photos!


To start, I did a little prep work with my fresh ingredients.  I chopped up one yellow onion, minced five cloves of garlic, a few handfuls of basil and a small handful of flat Italian parsley.


I heated up a sauce pan on the stovetop and added a few tablespoons of extra virgin olive oil on medium high heat.  When the pan was hot, I added the chopped onions and cooked them until they were translucent.  I then added the garlic and cooked them for a few minutes before I added about one pound of ground turkey.  I cooked the turkey for about eight minutes - not quite browning it but just cooking it through.


I then added a large can of peeled and crushed tomatoes and gave it a good mix.  When the ingredients were all wet with the tomato puree, I added a can of tomato paste to help thicken up the sauce.  I seasoned the sauce with salt, fresh cracked black pepper, crushed red pepper flakes, and dry oregano.  I lowered the heat and put a lid on the pan and let the sauce simmer.  When the sauce was nearly done, I stirred in the chopped basil and parsley to the sauce and again let it simmer some more.

While the sauce was simmering, I got to work on the other ingredients for my lasagna.  I bought a huge pound box of washed and trimmed spinach.  Although the spinach was pre-washed, I gave them a quick rinse to add some moisture to the leaves and let them air dry..  I put a wok on medium heat and added the spinach in batches of about a quarter pound each.  The water helped the spinach wilt beautifully and I was in love with the vibrant green color of the spinach. 


When the spinach was done cooking, I put them in strainer to help get out some of the excess water.

My final ingredient to the lasagna was probably the easiest.  I took a container of low-fat ricotta cheese and added some leftover grated Parmesan cheese (I'd guess it was a little under a half a cup), one white egg, and fresh cracked black pepper.  I mixed the ingredients together but didn't want to overwork the cheese.

Then came the fun part - putting together the lasagna.  While B was absent in the kitchen during the cooking, he wanted to participate in the actual construction of the lasagna.  First, B gave a 9 x 13 baking dish a nice coating of cooking spray.  On the bottom layer, I added about a third of my turkey red sauce and spread it out for a nice thin layer on the bottom of the dish.  Next, I added the lasagna noodles. Since this was my first attempt at lasagna, I decided to cheat and use the no-bake noodles.  After the noodles, B spread out a thin layer of the ricotta cheese mixture.  This was a bit difficult as the cheese was thick but I reminded him that it didn't need to be perfect!  I added a healthy layer of shredded mozzarella cheese along with a layer of the wilted spinach.  This was the first layer and we repeated this step two more times.  We topped the lasagna with a layer of lasagna noodles, sauce and then a healthy spread of mozzarella cheese along with a sprinkling of Parmesan cheese (although this was of the leftover pre-packaged variety since I used all of our fresh grated cheese earlier with the ricotta mixture). 

.
Since KK wasn't coming over for dinner for a few hours, we put the lasagna in the fridge.  Meanwhile, I got to work on a simple salad to accompany our lasagna.  I planned on using half a package of Olivia's Organics 50/50 Blend, which is half baby spinach and half spring mix.  I washed a package of beautiful cherry tomatoes in a variety of colors - red, organge, yellow and even purple.  They were too gorgeous for me to pass up.


About an hour before dinner, I put it in the oven at 350 degrees for an hour. About forty-five minutes into cooking, I realized forgot to cover the lasagna with foil while it was baking. But this ended up being a great mistake because it resulted in a nice crispy top layer. For the last fifteen minutes, the lasagna baked with an aluminum foil that had a nice coat of cooking spray on the side facing the lasagna

When it was actually dinner time, I put the greens and the tomatoes together with half a package of Olivia's Croutons in the Parmesan Pepper seasoning.  B made a dressing for the salad on the side that consisted of white champagne balsamic vinegar, olive oil, garlic powder, oregano and rosemary. 


The dinner was simple, hearty and tasty.  We all had second helpings of both the lasagna and the salad, although about half of the lasagna ended up in the freezer for a lazy day where we don't feel like cooking.  The entire meal was fantastic with a bottle (or two...or three) of red wine. 


We ended the night with a tasty dessert that KK made that consisted of spice cake, shredded carrots, crushed pineapples and nuts - topped with a scoop of vanilla ice cream.  The cake was so moist and I loved it because it wasn't too sweet.  The best part is that she made this in her slow cooker and I've already bugged her to send me the recipe!

This was my first attempt at cooking a lasagna and I think it was a success.  But with a freezer full of lasagna, I think it will be awhile before I attempt to make it again!  What's your favorite recipe to make lasagna?

Happy Easter!


Hope the bunny was good to you! I'm actually celebrating Easter next weekend because I'm working at the bakery today. My family -- minus a couple siblings -- is going to trek up to Boston next weekend for Easter lunch/dinner with my boyfriend and me. (By the way, my boyfriend's name is Jeff, and I'm going to start referring to him by name instead of saying my boyfriend, my boyfriend, my boyfriend. It starts to sound annoying, doesn't it?)

I'm very excited because I haven't seen my family in a while (my dad hasn't even seen where I live, and I moved in with Jeff almost a year ago now!), and it will be my first time hosting the holiday. I have a great Easter menu planned (and maybe some special birthday treats for my mom and sister), but you'll have to wait to hear about it. In the meantime, what are you having today? Are you doing a brunch or a dinner or both? Most important, what are you having for dessert?

I made these cupcakes this past Wednesday.


While I'm getting my Easter fill at the bakery between our colorful cupcakes and Oreos, meringue Peeps, hot cross buns, and carrot cake cupcakes, I still needed to make something festive at home, mainly because I ordered the most adorable sugar bunnieschicks, and carrots from King Arthur Flour, and I was dying to use them. (I just noticed they're all on sale now too...)


I thought about making carrot cake cupcakes, but there's no chance Jeff would eat them and I knew wasn't going into the office during the week (where I usually bring my baked creations), so I'd either eat way too many cupcakes myself or too many of them would go to waste. So that wasn't the best idea.


While I was tossing around other ideas, the copy of Ad Hoc at Home that I'd ordered arrived in the mail. (Short tangent: This book is gorgeous, hilarious, and full of amazing recipes. You must get it!) When I saw a recipe for white cupcakes with vanilla buttercream frosting in the dessert section, my decision was made.


I found this cupcake recipe very interesting because you make a normal batter, but then you whip egg whites and sugar until you have a meringue, and then you fold that into the batter. I've folded beaten egg whites into a batter before but not with sugar too -- at least not that I can remember.


It made for some very light, airy cupcakes.

Where I got creative and festive was with the frosting. I decided to divide it up and make different pastel-colored frostings.


Jeff loved this frosting, and that is saying a lot because he finds most buttercreams way too sweet and never enjoys the frosting, whether on my cupcakes or cupcakes we've gotten at various bakeries. I have a feeling I'll be using this frosting from now on. (He has more than hinted at wanting me to make it again.) I agree that it's very good, maybe because it's lighter and there's no confectioners' sugar in it to give it such a cloyingly sweet taste or dense texture. The only drawback is that it's a bit involved because you have to whisk egg whites and sugar in your mixing bowl on the stove over a pot of simmering water first. Then you return your bowl to your stand mixer and add in chunks of butter and vanilla paste (or extract -- I used paste because I had it).


My only warning on this is to not rush it like I did. Definitely rub a little of the whisked egg white and sugar mixture between your fingers before taking it off the heat. The sugar might look like it is dissolved, but that may not be the case. My frosting was a little gritty, but it was just sugar grit, so it's not like that was a bad thing.


Happy Easter!


By the way, I've been getting some great responses on my survey, so I'm going to keep it going for a little while longer. If you haven't had a chance to take it yet, click here!

Thursday, April 1, 2010

Newton Running Week 1

This is the second in a series of posts about my experience with Newton running shoes.  In case you're wondering what they're all about, check out my first post to learn a little bit about the shoes!

To adjust to Newton running shoes (or barefoot running),  you need to start slow.   There's no putting them on for the first time and running 10miles.  Your feet have been dormant for many years in our cushioned shoes, it takes time to strengthen and adapt the bones and connective tissue in your feet.   To adjust to their shoes, Newton recommends starting with a run of 1-2miles.  Then run every other day, increasing distance by no more than 10min a day (umm, that sound wrong to anyone else?) and continuing to rotate with your old running shoes for the first couple of weeks.  Two more things, don't try to increase intensity (speed or distance) until you're adjusted, and focus on good form.   As with all things, if you do feel unusual discomfort, back off!


I picked up the shoes on a Saturday, and for one last hurrah, went out for a 6.5mi run in my old shoes on Sunday.  I needed to get used to the idea that I may be setting myself back and it might not be easy.    Then I got started.    I'm not sure if I'll need my orthotics, but because the shoes seemed to correct alot of my alignment on their own, I'm giving it a try without them, and then I'll reassess the situation.

Tuesday (Run 1):  1.6mi
     Wow, these feel light.   Take it easy...  think about your form...  Hmm, done already?  13ish minutes?  You should stop before you hurt yourself.

Wednesday (Run 2):  1.6mi
     Still can't get over how light these feel!  A little tightness in my right ankle/lower calf, stretch that when you get home.  Otherwise... ok?  Am I doing this right?  Does my knee hurt?

Thursday (no run)
     I went to a spinning class, and realized how tight my calves were when we started to climb.  I started to roll out and use my Trigger Point kit on both of my calves, but probably should've done this from Day 1.

Friday (Run 3):  2ish miles
     Still a feeling a little tightness on the right side, but otherwise good.

Saturday (no run)
     Another try at a spin class and more rolling.

Sunday (Run 4):  2.5mi in Newtons followed immediately by 5 in my old shoes
     This was the big test in my mind, a back-to-back comparison to see how they felt.  The first 2.5:  feeling good, take it easy...  look at my watch (8:15 pace)... really??...  check back...  this feels easy...  try to slow down, you've got more miles coming!
     Shoe change:  Umm, these feel wierd, why am I so high?  This is going to be interesting...  can I turn around and get my Newtons?...  I can tell I'm trying to land on my midfoot for the first 1/4mi or so, but don't feel the same "spring in my step" as when I had the Newtons on.  My legs felt heavy the entire run, and I felt sluggish.   By the end of my run, my joints felt like they had taken the brunt of the work.

While I'm still feeling a bit tight in my calves, I'm cautiously optimistic after Sunday's run.  I immediately noticed how much harder it was to keep a quick cadence in my old shoes and lift my knees.   While skeptical at first, I think I felt the energy transfer they talked about on my Sunday run, and really like what these shoes do for my form (at least from what I can tell).  It's going to be hard to try and run in my old shoes again, especially back-to-back like that.  Maybe I can throw a short run with them, or just try my orthotics in the Newtons?  We'll see!  I realize I didn't follow all of the rules I mentioned to a T, but I think I took it slow...

I'll be back soon with a recap of Week 2, and some Easter cooking this weekend!  Have a great day/weekend :)

Delightful Ice Cream Sandwiches With Walker's Shortbread Cookies


When the wonderful folks at  PMG asked me if I'd like to try out some products from Walker's Shortbread, I was thrilled and also very nostalgic.  You see, my grandmother LOVED shortbread cookies and would always have them on hand at her place for when my sister and I came to visit.  While my grandmother is no longer with us, to this very day, when I eat a shortbread cookie, it brings up the fondest of memories of eating these cookies with a tall glass of milk at my grandmother's place.
Thinking of family in mind, I was happy to discover that Walker's Shortbread is made by the Walker family in Scotland and they have been producing their shortbread cookies for over a hundred years.  Although technology has changed, the company still bakes their cookies in small batches to produce the classic shortbread flavor and appearance.  In fact, I had no idea that their shortbread is baked with no artificial flavoring, coloring or additives.  These cookies contain simple ingredients - flour, pure creamery butter, sugar and salt.
The folks at Walker's Shortbread sent over several packages of cookies for me to try out:
Chocolate Chip Shortbread
The chocolate chip shortbread cookies were a big hit.  I received a box with 24 packs and each pack contained two cookies.  I loved these cookies because it had the rich buttery shortbread flavor with little chocolate chips in it.  The packaging made it easy for me to throw a pack in my purse to snack on at work.  But I didn't want to be tempted with eating them all of them so I put them in a big bowl on our dining room table.  Our friends loved snacking on them just as much as we did, especially when I would encourage them to take a few for the road!  


Of course I couldn't just eat the cookies plain and I also made delicious mini ice cream sandwiches with softened vanilla ice cream in between the two cookies.  Because of the shortbread consistency, these cookies didn't get soggy with the ice cream filling.  These were a big hit with my friend KK when I made them for a dessert when she came over for dinner one evening,  I forgot to take a picture so I just had to make another ice cream sandwich another night for the photo.  


My boyfriend was happy to oblige in eating the ice cream sandwich after the photo was done!

Stem Ginger Biscuits

The Stem Ginger Biscuits were by far my favorite of the Walkers products.  These were hard ginger cookies with small pieces of candied ginger in them.  I am a huge ginger fan and I think these biscuits hands down beat any other ginger snap or cookie for its ginger flavor.  

I again used these cookies to make an ice cream sandwich.  After all, I couldn't let B eat his chocolate chip shortbread sandwich by himself, could I?  


I really loved the flavor contrast of the sharp ginger bites and the smooth creamy vanilla ice cream (I used Haagen Dazs).  For the same reason, I'd love to try using the Stem  Ginger Biscuits as a crumble atop something rich and creamy, like a buttermilk pie! 

Shortbread Fingers


The Shortbread Fingers were really interesting.  They had the same shortbread delicious buttery flavor but they were so much lighter than your usual shortbread variety.  While these fingers didn't quite "melt in the mouth" as the package indicated, the lighter consistency did make the shortbread fingers the perfect nibble with a cup of my favorite Tazo chai tea.  


I think that a package of these shortbread fingers would make a great pumpkin pie or cheesecake crust in lieu of a graham cracker crust.  I haven't tried it out but I'd guess that the shortbread fingers buttery consistency would work well after its been reduced to a crumble consistency in the food processor and mixed with softened chopped pieces of butter.


Overall, I really enjoyed testing out the Walkers products.  I checked out their website and discovered that you can order these products online although I have found them locally at DeLuca's Market and Cardullo's Gourmet Shoppe.  The website also has some useful recipes for different ways to try out their products.  But for me, my favorite way is to eat them plain - straight out of the package.


If you have any questions or would like to know more about Walkers Shortbread products, please let me know and I can put you in contact with them  Also, thanks to PMG for introducing these yummy shortbread products to me and sending them my way!

Coconut Creme-Kissed Chewy Chocolate Cookies


Have you tried Hershey's Coconut Creme Kisses? They are my absolute favorite of all the seasonal Kisses. Their light, creamy coconut filling just screams spring. Speaking of -- I am so happy it's April! I'm looking forward to getting through all these showers and seeing some sunshine. We already went to storage last week and switched out all our heavy winter coats, sweaters, and boots for flip-flops and lighter layers. I'm longingly eyeing the capris, skirts, and dresses hanging in the closet and looking forward to the days I can wear them. Are you ready for warmer, sunnier days?


But back to these Kisses... about three years ago, my old roommate and I made chocolate chip cookies using the Coconut Creme Kisses instead of chips. They were spectacular! Each spring since then I have searched for the Kisses but have not been able to find them. I figured Hershey's decided not to make them anymore... until the other day when I was picking up some other Easter candy at Target. I caught a glimpse of the bright blue bag and did a little jump for joy in the aisle. I may have even cheered out loud. I immediately snatched up two bags and knew that I'd be making cookies with the Kisses, as well as just eating them.


But this time, instead of chocolate chip cookie dough, I was craving a fudgy chocolate cookie with waves of coconut throughout. After checking out a couple of chocolate cookie recipes, I went with Dorie Greenspan's Chocolate Chunkers for the base of this recipe. I had made the Chocolate Chunkers a while ago and really liked the rich chocolate flavor and the incredible chewy texture. I hoped the cookie dough would pair well with the Coconut Creme Kisses.


I went through the recipe making some additions and subtractions and came up with what I thought would work well.


And I have to say I think I did a good job because these cookies were just luscious!


Coconut Creme-Kissed Chewy Chocolate Cookies (adapted from Baking From My Home To Yours)
(Printable version)

Ingredients

1/3 cup all-purpose flour
1/4 cup unsweetened cocoa powder
1/2 teaspoon salt
1/4 teaspoon baking powder
3 tablespoons unsalted butter, cut into 3 pieces
6 ounces bittersweet chocolate, coarsely chopped
1 ounce unsweetened chocolate, coarsely chopped
2 large eggs, at room temperature
2/3 cup sugar
1 teaspoon pure vanilla extract
10-ounce package Hershey's Coconut Creme Kisses, frozen


Preparation

Preheat oven to 350 degrees. Line two baking sheets with parchment or silicone mats.

Place butter, bittersweet chocolate, and unsweetened chocolate in microwave-safe bowl. Microwave for 1 minute or until chocolate is melted. Stir to combine, and set aside to cool.

In a small bowl, sift together the flour, cocoa, salt, and baking powder.

In a stand mixer fitted with a paddle attachment, beat the eggs and sugar together on medium-high speed for about 2 minutes, until they are pale and foamy. Add the vanilla, and then scrape down the bowl. Reduce the mixer speed to low and add the melted butter and chocolate, mixing only until incorporated. Scrape down the bowl again, and then add the dry ingredients. Mix on low speed just until the dry ingredients disappear into the dough, which will be thick, smooth, and shiny.


Unwrap and chop Hershey's Coconut Creme Kisses.


Add to mixing bowl, and mix on low speed, just until Kisses pieces are dispersed.


Using a small scoop (two teaspoon capacity), place mounds of cookie dough about 1-inch apart on prepared cookie sheets.


Bake the cookies one sheet at a time for 7 to 8 minutes.


Let cool in pan on wire rack for 1 minute and then transfer cookies onto rack to cool completely (or eat them warm).


Makes 48 to 50 2-inch diameter cookies (depending how much dough you eat prior to baking the cookies)

What are your favorite seasonal Hershey's Kisses?

Soft Polenta with Sausage and Beef Ragu

It doesn't get any easier than this!  I'm thinking that the photo doesn't really capture the yumminess of this simple dish but it's too good not to share it anyway!

Polenta can be made a number of ways.  Soft (like you see here), fried, grilled and baked.  All of the variations start out soft like this so this is the easiest version of them all. 

Polenta is great topped with a meaty sauce or if you are a vegetarian, a yummy sauce with mixed mushrooms is fantastic!  I used my Sausage and Beef Ragu that I posted yesterday and it was a great way to use up the leftover sauce.  This is pefect to make for one so it's a great go to meal when you don't feel like working up a sweat in the kitchen if you're alone.  Just follow the directions on the package and use the serving size as a guide. 

Soft Polenta with Sausage and Beef Ragu

Serves 1-2

Ingredients:

1/3 cup Instant Polenta
1 cup chicken broth
1/2 cup Romano or Pamigiano Cheese
1 tablespoon butter
About 1/4 cup milk (nice splash for creaminess)
1 cup of prepared sauce such as Sausage and Beef Ragu

Tools - Whisk

Directions:

Bring chicken broth to boil in a small pot.  Add polenta slowly while continuously stirring with the whisk.  Stir for about 2-3 minutes until thick and smooth.  Add butter, milk, cheese and stir until incoporated.  Taste for seasoning.  Pour immediately into bowls and top with heated sauce. 

Enjoy!

Click here for a Printable Version of Soft Polenta with Sausage and Beef Ragu