Monday, January 31, 2011

Rosemary Focaccia


Last night my mother and her boyfriend, Charley, came over for dinner. We often eat together on Sunday evenings—sometimes at their house, which is across the river in Brookline, and sometimes at our apartment, which is teeny-tiny in Cambridge. When they come here, they always bring their standard poodle, Lily, who spends the night jumping up and down, waggling her little fur-ball tail.  


For this Sunday supper, I decided to make a dish that I had seen in an old Jamie Oliver cookbook, one that I had bought at a second-hand bookstore this summer in Maine. Pork chops with Parsnips, Pears, and Potatoes. I admit: I chose it because of the alliteration. I like the way the words sound. I learned: that wasn’t a good idea. This dish was mediocre, monochromatic, and mundane. (Hah!).


As much as I cook, as much as I love to write about my kitchen triumphs here, I do fail. Quite often, in fact. More often than I’d prefer to admit. There’s the flat, lifeless loaf of bread. The bland, tough chicken breast. The dry coffee cake I just can’t make myself throw away. Failing in the kitchen is part of the learning experience, I tell myself. I try not to let it bother me. After all, as Julia Child once said: "The only real stumbling block is fear of failure.  In cooking you've got to have a what-the-hell attitude.”


Luckily, last night’s failure was countered by a resounding success: Focaccia.  


This crusty, salted, rosemary bread recipe, adapted from Gourmet, only uses five ingredients. It takes some time to rise, but it’s worth it in the end. It’s an easy entry into working with yeast breads, if you never have before. In fact, I think it would be pretty hard to fail. (But it’s okay if you do! What-the-hell!)


Rosemary Focaccia
Adapted from Gourmet

This bread is great cut into strips and served with more olive oil for dipping, or in order to mop up some kind of sauce.  It’s also pretty awesome when cut into a more hefty square, sliced in half, and turned into a sandwich, one that your boyfriend takes to school for lunch.

1 (1/4-ounce) package active dry yeast
4 cups (+ or – 1 additional cup) all-purpose flour
1/4 cup plus 3 tablespoons extra-virgin olive oil
1 tablespoon finely chopped fresh rosemary
1 teaspoon coarse sea salt

Stir together 1 and 2/3 cups lukewarm water (between 105 and 115 degrees Fahrenheit) and the yeast in the bowl of a standing mixer. Let stand until creamy, about 5 to 7 minutes. Then, add the 4 cups of flour, 1/4 oil, and 3 teaspoons of table salt. Beat with a paddle attachment on medium speed until the dough forms. Replace the paddle with the dough hook and knead the dough at high speed for about 3 to 4 minutes, until it’s smooth and sticky. Add more flour if needed. (I used an additional half cup of so.)

Turn the dough onto a floured surface and knead for a couple minutes with your hands, adding flour if necessary. The dough should be slightly sticky. Transfer it to an oiled bowl, turn to coat, and then cover with plastic wrap. Let the dough rise at a warm room temperature until it doubles in bulk, around 1 and ½ hours. (Or more. My apartment is on the cooler side, so I let it rise for close to 3 hours. You can’t rush bread dough, I’ve learned.)

Press the dough evenly down onto an oiled baking sheet. Let it rise again, covered in a kitchen towel, for an hour or so, until it again doubles in bulk.

Preheat the oven to 425 degrees Fahrenheit. 

Stir together the rosemary and remaining olive oil. Make shallow little indentations all over the dough with your fingertips. Brush with the rosemary oil, letting it pool in the shallow craters. Sprinkle sea salt all over. Bake in the middle of the oven until golden brown, 20 – 25 minutes. Immediately transfer to a cooling rack. Serve warm or at room temperature.  


No-Bake Fudgy Oat Cookies - Easy and Delicious

My mom got me "The Taste of Home: Cookies" recipe book for Christmas this year, so I was excited to try out one of the recipes I was eying  and to bring them to a dinner we were attending.  Even better, the recipe we chose was for drop cookies that required no baking!  So, I was hoping they would turn out well because they seemed like one of those good recipes to have on hand when you quickly need a dessert.  I was pleasantly surprised when they actually came out well and actually got compliments!

Yummy Cookies
The necessities...

2-1/4 cup quick-cooking oats
1 cup flaked coconut
1/2 cup milk
1/4 cup butter
2 cups sugar
1/2 baking cocoa
1 teaspoon vanilla extract

The Ingredients
So really, this recipe is super easy.  First, I just mixed together the oats and coconut in a large bowl and set it aside.

Oats and Coconut
The next step, and actually the second to last step, was to mix together the butter and milk in a saucepan.  After the butter melted I added the cocoa and sugar to the saucepan.  There was no amount of time set to stir this before adding the oat and coconut mixture, but I would suggest a couple of minutes because the sugar needs a bit of time to dissolve fully.  Otherwise you can taste the sugar crystals in the cookies - a few of mine had this problem.  So, after making sure the sugar and cocoa were fully dissolved I stirred in the oats and coconut mixture and stirred (constantly) for another minute or so until fully blended.  Last but certainly not least, I removed the pan from the heat and stirred in the vanilla.

Cookie Mixture
Finally, the last step was merely dropping teaspoon size blobs of the mixture onto wax paper.  I used parchment paper because that's all we had on hand.
Setting - almost ready to eat
Then you are done!  Really, you just let these sit until the chocolate and everything sets.  I made these at about 9PM and let them sit out over night, so I am not to sure how little time you can wait.  The final product at the top looks much like this picture here.  The other thing is that the recipe did not say to put these in the fridge or anything, but I am sure this would be a way to speed up the "setting" process. 

Like I said above, these were yummy cookies, although I wish I had allowed the sugar to dissolve a bit more.  They had some of my favorite cookie components all in one bite - chocolate, coconut and oatmeal.  In my book, it does not get much better than that!  However, the rest of the crowd liked these cookies as well, so it wasn't just me - I promise!

Cake O's by Cakes Suzette

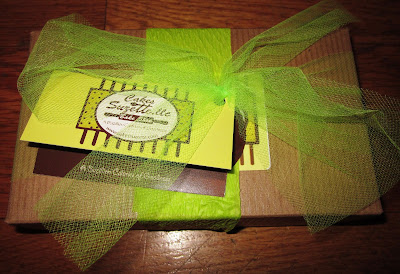
Inspired by a post I read on 5 Star Foodie Culinary Adventures featuring a product review of Cake O's, I meandered over to the company website to check out what these scrumptious looking bites of dessert were all about. I discovered Cakes Suzette an online bakery based out of Los Angeles. Their signature product is the Cake O, a tasty treat measuring about 1 1/2 inches in diameter made in small batches to ensure freshness, with flavorful frosting coated in rich velvet chocolate. Cakes Suzette prides itself on the use of quality ingredients including cage free eggs, rich Belgium chocolate, fresh picked lemons and vanilla from the Sonoma Syrup Company. Impressed with what I'd discovered, I sent the company an inquiry and was contacted by Ira, the VP of Sales and Marketing. The thought of trying Cake O's had me extremely delighted and I was happy my inquiry was met with such a welcome response. Less thank a week later, I received a gift box fastened with a lime green bow that revealed a Cake O's Assorted Sampler.These cakes were not what I expected, in a good way. A very good way. A dense batter strikes a balance of semi moist cake that is just shy of being considered overly rich; in some instances containing bits of the feature ingredient melting into each bite of cakey goodness. Natural frosting that is void of any overpowering or artificial sweetness is infused and the round nugget is coated in chocolate that cracks gingerly in your mouth before melting into your taste buds. This is not your typical light and fluffy batter or whipped cake frosting. The cakes, to me, are an innovative play on a classic box of chocolates. In the Red Velvet Cake O, tiny chocolate chips are laced within the red batter infused with cream cheese frosting and topped with white chocolate.
First impression: That's a damn good cake.
Mocha was up next, the chocolate cake has cappuccino and espresso chips inside, is infused with coffee butter cream icing, coated in chocolate and topped with an espresso bean. The coffee flavors were mild, taking a backseat role, or perhaps were overpowered by rich chocolate. On the contrary, the Chocolate Peanut Butter was bursting with creamy nutty flavors. The peanut butter frosting graces the taste buds right off the bat. The chocolate cake has peanut butter chips baked in so even more bursts of the feature ingredient is laced throughout each bite. Chocolate Peanut Butter takes the cake! (In other words, it was my favorite.) Next up was the Lemon Cake, where the aforementioned fresh picked lemons come into play. Tart citrusy batter mingles with sweet raspberry frosting, followed by rich white chocolate that shatters into a melty crumble. If you prefer fruit to chocolate, this bright and refreshing flavored Cake O is for you. The classic Vanilla Chocolate is vanilla cake baked with chocolate chips, combined with bittersweet chocolate frosting and covered in milk chocolate. This cake embodied a lighter fluffier texture in comparison to the others.
And finally, the Carrot Cake, decorated appropriately, combines traditional cream cheese frosting with a white chocolate finish. This cake was exceptionally moist and super flavorful. I enjoyed sampling these over the course of the weekend (way to filling to eat all in one sitting) as well as Cakes Susette's Mallomore Bars made with organic gram cracker, homemade marshmallow, and rich dark chocolate. The products tasted unbelievably fresh, especially having traveled all the way from the West Coast. You can purchase Cake O's in quantities ranging from 6 to 36 pieces in flavors including what I've sampled above as well as Chocolate Mint, Brownie, Coconut and Spiced Pecan. Many thanks to Ira for providing me the opportunity to sample Cakes Suzette's truly unique and amazingly flavorful signature products.

Free Coffee With SeamlessWeb...and Two Giveaways!

As much as I love cooking and trying out new restaurants, there are some nights where you just want to order some take-out and curl up on the couch with a good movie and a bottle of wine.  So when a promotion specialist contacted me about SeamlessWeb (a new website where you can order takeout) and their upcoming promotions in Boston, I wanted to share it with my readers.  


According to SeamlessWeb:

  • After two successful years in New York City, SeamlessWeb is bringing its Free Coffee Days promotion to Boston!  From February 1st – 4th, the online food delivery and takeout ordering service will hand out over 10,000 free cups of coffee all around the city from a SeamlessWeb branded truck.
  • To coincide with this promotion, SeamlessWeb is launching a social media photo sweepstakes where people can Tweet or post to Facebook a photo of their free coffee to win $100 in food. In addition, SeamlessWeb is offering new customers $5 off by using the code FREECOFFEE ($10 minimum purchase). Visit the Free Coffee Days site to find the locations to receive your complimentary cup of joe and the full details about the photo sweepstakes.  
  • Besides handing out free coffee, SeamlessWeb is always available for people to order delivery and takeout from over 380 restaurants in the Boston metro area.

SeamlessWeb is not only handing out 10,000 free cups of coffee and offering new customers a $5 off discount code, but they are also offering two of my readers a $25 SeamlessWeb online gift card to order food delivery and takeout.  Sweet, right?

I'm going to give you two different ways to enter:
1.  Leave a comment telling me the strangest (or most interesting) thing you've ever eaten with a cup of coffee.
2.  Tweet "I want to win a @SeamlessWeb gift card from @Funfearlessbean http://bit.ly/gXFGra" and leave a comment telling me  you've done so.

All entries must be submitted by January 31, 2011 at 11:59 PM (EST) and two winners will be picked by Random.org.


All the ideas and opinions expressed are my own.  No monetary compensation was received for doing this post, however, I was provided with the opportunity to present this reader giveaway.

Free Coffee And A Giveaway From SeamlessWeb

I was recently contacted by SeamlessWeb and learned about its new Boston-area online food ordering site (which we actually used to order some Chinese food last week) and the upcoming free coffee days it's hosting in Boston. I wanted to share this information with you, as well as give you the opportunity to win some gift cards (supplied by SeamlessWeb) to use on the site!


"After two successful years in New York City, SeamlessWeb is bringing its Free Coffee Days promotion to Boston!  From February 1st – 4th, the online food delivery and takeout ordering service will hand out over 10,000 free cups of coffee all around the city from a SeamlessWeb branded truck.


To coincide with this promotion, SeamlessWeb is launching a social media photo sweepstakes where people can Tweet or post to Facebook a photo of their free coffee to win $100 in food. In addition, SeamlessWeb is offering new customers $5 off by using the code FREECOFFEE ($10 minimum purchase). Visit the Free Coffee Days site to find the locations to receive your complimentary cup of joe and full details about the photo sweepstakes.


Besides handing out free coffee, SeamlessWeb is always available for people to order delivery and takeout from over 380 restaurants in the Boston metro area."

And SeamlessWeb has given me the opportunity to offer $25 gift cards to two of my readers! 

To enter to win, please leave a comment telling me what your favorite flavor of coffee is.

For an additional entry, please tweet about this giveaway, and leave an additional comment letting me know that you tweeted. (I can't give you an extra entry if you don't post a separate comment, so make sure you do.)

You have until Friday, February 4, 2011, at 11:59 p.m. EST to leave your comments. I'll select two winners and announce those winners on February 5. Make sure you leave some way for me to contact you if you don't automatically link back to your blog. Good luck!

Sunday, January 30, 2011

Baked Black Bean Dip

Are you ready for some football???   If you're in need of a quick and easy dish for a superbowl spread (or any other gathering), look no further.  This twist on a traditional seven-layer dip came together in minutes and after a short stint in the oven to melt the cheese, was ready to serve with tortilla chips.


I used a prepared salsa that already had onions, garlic and jalapenos, but you could always use some chopped tomatoes and lightly sauteed onions and garlic.  Adjust the heat levels to your own taste as well, adding an extra jalapeno or hefty shake of cayenne pepper.


If you don't have smoked paprika on hand, you could get the smokiness by adding in a chipotle pepper and a bit of adobo sauce when blending in the food processor.   This will bring some heat as well, so be careful when adding the cayenne!


One last note on texture.  I made this dip pretty smooth, if you're looking for a dip with a little bit goin' on, feel free to reserve some of the beans before blending together.  These can be mashed lightly with a fork and folded in by hand after the rest of the ingredients are well-mixed.  Adding some corn after blending the dip could also be a way to get some more texture.


Baked Black Bean Dip
Recipe by Shannon
Serves a crowd

2 16oz cans black beans (or 1 29oz can), rinsed and drained
1/2c Pace Mild Picante Sauce*  (or your favorite salsa)
1/2c 2% greek yogurt
1/4-1/2t cumin
1/4-1/2t smoked Spanish Paprika
dash cayenne
dash salt
juice of 1 lime
2-4oz grated cheese (I only had gruyere on hand, but cheddar or monterey jack might work better!)
scallions or herbs for garnish
tortilla chips for serving (Lime and Red Hot Blue Corn chips worked especially well)

Combine beans, salsa, greek yogurt, spices and lime juice in the bowl of a food processor.  Blend until smooth and ingredients well incorporated.  Taste and adjust seasonings.  This can be prepared ahead of time, simply refrigerate and then bake when ready to serve.

Preheat oven to 400deg.  Transfer bean dip into a baking dish (I used my 1qt au gratin dish).  Top with grated cheese and bake in preheated oven 15-20min, or until cheese is melted and bubbly.  Garnish with chopped scallions or herbs (parsley or cilantro) if you remember ;)  Serve with tortilla chips.


*I received a sample of Pace Picante Sauce at no cost as a part of the Foodbuzz Tastemaker Program.  Thanks for inspiring this appetizer!


Will you be watching this Sunday (either the game or the commercials)?   Favorite get-together appetizer?

Chicken Paprikash - who knew there was a spicy paprika!

I started following Martha Stewart's everyday food blog, which has lots of great recipes, and found this chicken paprikash recipe.  It seem relatively simple and also used a lot paprika, which is not a spice I generally utilize, and I thought it would add a new flavor to the kitchen.
The necessities...

* 4 chicken leg quarters, cut in half at joint (about 3 pounds total)

* Coarse salt and ground pepper
* 2 teaspoons vegetable oil
* 1 large yellow onion, halved and thinly sliced lengthwise
* 3 garlic cloves, roughly chopped
* 2 tablespoons sweet paprika
* 3 tablespoons all-purpose flour
* 1 3/4 cups low-sodium chicken broth
* 1 can (14 ounces) diced tomatoes
* 1/2 pound wide egg noodles
* 1/2 cup sour cream or thick plain yogurt

To begin, I chopped up my onion and and the garlic.

Chopped Onion

Chopped Garlic
Then I heated a couple of tablespoons of oil to a big cast iron pot.  Martha says to use a heavy duty pot or a dutch oven but since our Le Creuset is still in the mail, cast iron it was.  While the oil was heating I heavily salted and peppered the chicken and placed it in the pot, skin side down, and let them cook for about 6 minutes before flipping and cooking them on the other side for another 6 minutes.  Once the chicken was nice and browned I set it aside for later.

Chicken awaiting the next step...
I removed some of the fat and oil from the pot and added my sliced onions and chopped garlic and gave it a few stirs.

Sizzling and reducing
I like my onions really well cooked, so I let them cook down about 5 minutes.  Next I added the paprika and flour and stirred it up.  Martha said that it should be stirred until the paprika stuck and was fragrant.  For me however, the paprika stuck immediately, not allowing much time for it to become fragrant (this could have been due to the fact that I was using a non-enamel cast iron pot, or the fact that the paprika was on the older side - who knows.)  So, I moved to the next step quickly and added the chicken broth and stirred until the mixture was smooth.  I added the can of diced tomatoes and gave the pot another couple of good stirs, making sure everything was blended together.

Sauce is ready to go
I took the cooked chicken and added it back to the pot, skin side up, and made sure it was basically covered by the sauce.
 
Simmering
 I covered the pot and let it cook on a simmer for about 20 minutes, allowing the chicken to fully cook through.  Meanwhile, I cooked up some pasta - while Martha said I should use egg noodles, the store I shopped at only had pasta, so I cooked pasta that was roughly the same shape.

Once everything was finished, I put the pasta in bowls and then placed the chicken pieces on top.  To the sauce in the pot I added the sour cream, stirred it all up, and then ladled the sauce into the bowls.

Ready to serve
Now, I think if I were going to serve this at a dinner party of something, I would have tried to add some greenery to dress it up a bit.  But given I did not have any one hand, Nick was stuck with an ungarnished plate!

This dish was pretty good, but not great.  I think part of the issue (like I said above) was that the paprika did not really get enough time to cook and fully develop for any number of reasons.  Also, this recipe did explain that there are actually two types of paprika: a sweet variety, which is more common, as well as a Hungarian variety, which is a lot spicier.  I think the extra kick would have really added to the flavor and given the whole dish an extra dimension.  I also think this could have been way better if it was made in the new dutch oven....so I may have to repeat this one to test my theory!

Cocoa Brownies With Brown Butter And Walnuts


Another big snowstorm is on its way this week, and Boston is basically already bursting at the seams with snow. We've run out of places to put it, getting around is treacherous -- both walking and driving -- and it no longer looks very pretty. The snow is slushy in some places, mixed with mud and salt, and piled up taller than me.

At least Gunner loves the snow piles!
(That fence is 6 feet high!)
When the outside world is not too inviting and the weather is downright menacing, I like to stay holed up inside and often wonder why humans can't hibernate too. We all seem to have this go-go-go mentality, and I know that working and making money and contributions to society are all important, but sometimes it would be nice to just take a breather. My office never closes, and that makes me especially bitter (it's not like we save lives or do anything that couldn't be put off for a day). At least I can work from home when the weather is bad, but that's not the same as having a day to just lounge around, watch movies, hang out with Jeff and Gunner, and enjoy life. Between the frightful weather and my depression at having to work in the midst of snowstorms that cause the whole rest of the city to shut down, I find myself craving good old comfort food.


When the February issue of Bon Appetit arrived in our mailbox, it was immediately clear to me what particular comfort food I needed: brownies. There on the cover was a stunning stack of shiny, fudgy brownies, studded with walnuts. The magazine touted them as the "best-ever brownies," and that and the picture convinced me I needed to make them. So last night, in preparation for this week's impending storm, I quickly whipped up a pan of them.


The recipe didn't call for the walnuts to be toasted, but I always like to toast nuts that will be incorporated into baked goods when I want a richer, "nuttier" flavor. Between that and the browned butter in these -- and my upgrade of the vanilla extract to Tahitian vanilla extract -- the brownies definitely get a deep, complex flavor. And if you follow the baking instructions and don't overbake these (very important), you'll get that nice, fudgy texture that every perfect brownie should have. I hope you get a chance to make and enjoy these brownies soon... especially if there's a snowstorm on its way to your area.


Cocoa Brownies With Browned Butter And Walnuts (adapted from Bon Appetit, February 2011)
(Printable version)

Ingredients

Nonstick baking spray
1 1/4 cups sugar
3/4 cup natural unsweetened cocoa powder
1/4 teaspoon kosher salt
10 tablespoons unsalted butter, cut in 1-inch pieces
2 teaspoons water
1 teaspoon Tahitian vanilla extract
2 large eggs (straight from the fridge)
1/3 cup plus tablespoon flour
1 cup walnut pieces, toasted

Preparation

Preheat oven to 325 degrees. Line an 8x8x2-inch metal pan with foil, leaving a 2-inch overhang, and spray the pan with nonstick baking spray.

Combine the sugar, cocoa powder, and salt in a small bowl, and set aside.

Melt butter in a medium saucepan over medium heat, and continue cooking and frequently swirling the pan until butter stops foaming and there are brown bits in the bottom of the pan, about 5 to 8 minutes.


Remove the pan from the heat, and immediately dump in the sugar-cocoa mixture. Add the water and vanilla, and stir to combine.


Let cool 5 minutes, and then add the eggs one at a time, beating vigorously after each addition with a firm rubber spatula or wooden spoon.


Add the flour, and stir until blended. Then beat vigorously for 60 strokes.


Stir in the nuts.


Transfer the batter to the prepared pan, and smooth the top.

Bake brownies until toothpick inserted in center comes out with only moist crumbs attached, about 25 to 30 minutes.


Cool in pan on rack.


Cut into squares, and serve.


While I wouldn't go so far as to say these are the best brownies, I thoroughly enjoyed them, and they even got a "very good" from Jeff. They are rich, soft, and fudgy, and I love how the walnuts add texture to these, even though I usually add chocolate chips and chunks to brownies as opposed to nuts.


What's your favorite brownie recipe? And are you sick of the snow?